

Table of Contents
- Start With a Systematic Visual Assessment
- Your Commercial Roof Inspection Checklist
- How to Document Roof Damage for Insurance
- Using Infrared Thermography for Roof Leaks
- Non-Invasive Detection Technologies
- Common Causes and Drainage System Checks
- When to Call a Professional Roofing Contractor
- Frequently Asked Questions
Last Updated: September 16, 2026
Start With a Systematic Visual Assessment
A commercial building roof leak investigation begins with a disciplined visual assessment, moving from the interior to the exterior before you touch a single tool. According to the National Institute of Standards and Technology’s building envelope research, uncontrolled water infiltration is one of the leading causes of premature commercial roof failure. At Total Cladding and Roofing LLC, we treat every leak call as a diagnostic exercise first and a repair job second.
Why? Because the wet spot on your warehouse ceiling is rarely sitting directly under the breach. Water travels along the roof deck, insulation, and structural members before gravity pulls it down.
Interior Signs That Point to Roof Failure
Look up before you look outside. Interior symptoms narrow the search area faster than any exterior walk.
- Stained ceiling tiles or discolored decking, especially in repeating patterns
- Rusted purlins, fasteners, or metal decking along a straight line
- Sagging insulation or soft spots underfoot on a mezzanine
- Musty odors near HVAC returns, a sign of insulation saturation
A common mistake is patching the ceiling stain and calling it solved. That stain is a symptom, not the leak.
Exterior Membrane and Flashing Checks
Once inside is mapped, head to the roof. Walk the perimeter first, then work inward.
Check the roof membrane for blisters, splits, and open seams. Examine every flashing detail: base flashings at walls, counterflashing, curb flashings at HVAC units, and pipe boots. These penetrations are where most water infiltration starts.
Your Commercial Roof Inspection Checklist
A commercial roof inspection checklist keeps the investigation repeatable, so nothing gets skipped between visits. Use this sequence on every building in your portfolio:
- Walk the interior ceiling and deck; photograph every stain
- Check roof membrane surface for blisters, punctures, and open seams
- Inspect all flashing, counterflashing, and penetration seals
- Test drainage: scuppers, drains, and gutters for debris and ponding water
- Examine expansion joints and parapet walls
- Inspect rooftop equipment curbs and support blocking
- Note ponding water areas and check for tapered insulation performance
- Photograph and log each finding with location and date
- Review the roof assembly and warranty documents for compliance requirements
Photograph every finding with a tape measure or reference object in frame. Insurance adjusters and warranty administrators reject claims that can’t be tied to a specific location and scale.
How to Document Roof Damage for Insurance
Documentation decides whether your claim gets paid. A roof inspection report for insurance purposes needs more than photos; it needs a narrative that ties each defect to a cause, a location, and a date. Most commercial property policies are written on either replacement cost value (RCV) or actual cash value (ACV) basis, and the difference changes what evidence you need to collect.
What Adjusters Actually Look For
A commercial property adjuster is trying to answer three questions: Was there a covered cause of loss? Is the damage consistent with that cause? Has the building owner maintained the roof? Your documentation should answer all three before the adjuster asks.
- Date and time of loss, matched to a weather event record (hail reports, wind gust data, or a dated work order if the loss was mechanical)
- Cause of loss narrative, hail bruising, wind uplift, mechanical impact, or long-term deterioration. Insurers treat these very differently.
- Pre-loss condition evidence, maintenance logs, prior inspection reports, and warranty records
- Photographic evidence with scale and context, wide shots showing the roof area, close-ups showing the defect, and a tape measure or reference object in frame
- Moisture readings and thermal imagery, supporting data that shows the extent of saturation, not just the visible surface damage
ACV vs. RCV: Why It Changes Your Evidence
On an RCV policy, the insurer pays to replace damaged materials at today’s cost, minus depreciation, then releases recoverable depreciation once repairs are complete. On an ACV policy, you receive depreciated value only. Either way, the adjuster needs to establish the pre-loss condition of the roof to calculate depreciation.
Warranty Notification Windows
Most commercial roof warranties require written notification within a set window after damage occurs, commonly 30 days, though terms vary by manufacturer and system. Filing an insurance claim without notifying the warranty administrator can void coverage on the affected area, even if the claim itself is approved. Read the warranty before you file, and send notification in writing with a copy of the claim number.
Filing a claim without documented maintenance history is the fastest way to a denied or reduced payout. Insurers treat an unmaintained roof as owner negligence, not covered loss, and warranty administrators treat late notification the same way.
Building the Claim File
Assemble one binder or digital folder per loss event containing: the loss date and weather record, the inspection report with photos, moisture and thermal data, maintenance logs for the prior 24 months, the warranty document and notification letter, and the contractor’s scope of repair. Hand the adjuster a complete file and you control the narrative. Hand them a folder of phone photos and you inherit theirs.
Using Infrared Thermography for Roof Leaks
Infrared thermography for roof leaks detects temperature differences caused by trapped moisture, revealing wet insulation beneath an intact membrane. The technique is non-invasive, fast, and effective on large flat roofs where visual inspection alone would take days.
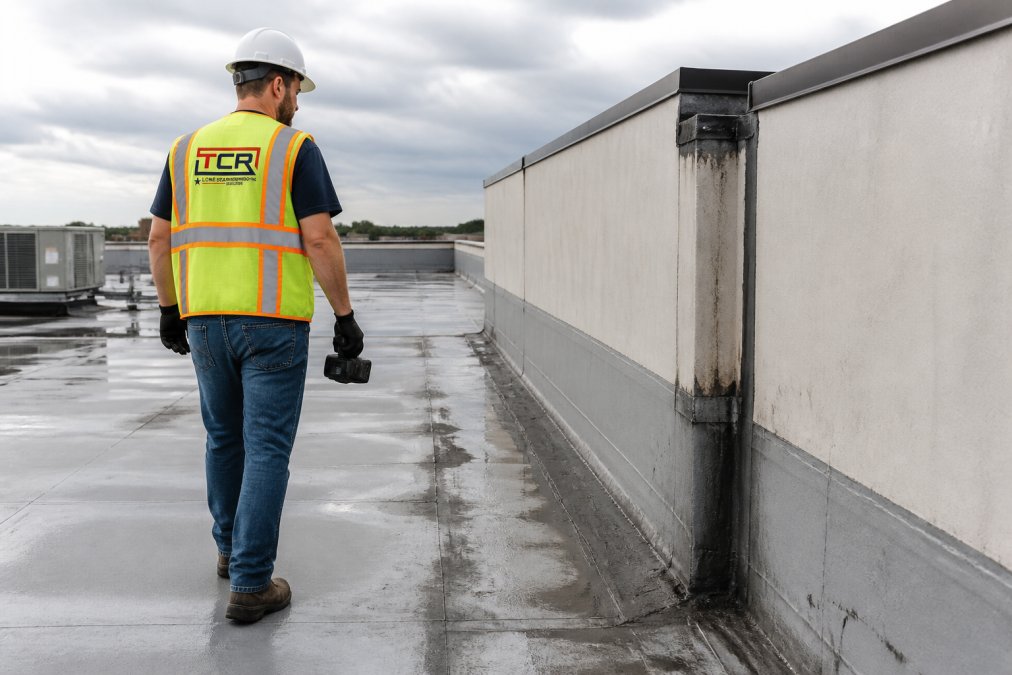
Thermography finds the wet area. It does not confirm the leak source. Always follow a thermal anomaly with a physical moisture test before ordering repairs.
Non-Invasive Detection Technologies
Non-invasive detection means finding the leak without cutting open the roof. Several technologies do this well, and the right choice depends on your roof assembly.
- Dielectric moisture testing: measures capacitance to locate moisture in insulation without penetration
- Electronic leak detection: applies a low-voltage current across the membrane; breaches show as current loss
- Moisture mapping: grids the roof and records readings to build a wet-area picture
- Drone inspection: captures high-resolution imagery of large or difficult-to-access roofs
- Thermal imaging: as covered above, identifies temperature anomalies from trapped moisture
| Method | Best For | Limitation |
|---|---|---|
| Infrared thermography | Large flat roofs, fast surveys | Needs temperature differential |
| Dielectric moisture testing | Locating wet insulation | Surface must be dry |
| Electronic leak detection | Conductive membranes | Not for all membrane types |
| Drone inspection | Steep or high roofs | No subsurface data |
| Visual assessment | All roofs, all budgets | Surface only |
Common Causes and Drainage System Checks
Most commercial leaks trace back to a short list of causes, but how you investigate them depends heavily on the membrane system you’re standing on. A TPO seam failure, an EPDM lap split, and a BUR ply separation all present differently, and a generic checklist will miss the failure mode specific to your roof.
Drainage Failures: The Most Common Driver
Ponding water is the single most common driver of membrane deterioration. When water sits on the roof for more than 48 hours, it stresses seams, accelerates membrane aging, and drives hydrostatic pressure into every weak point. Clogged drains, undersized scuppers, and blocked gutters all create ponding. Tapered insulation and properly sized drainage systems prevent it.
Material-Specific Investigation Techniques
The membrane type dictates where you look first and what tools work best.
Other Frequent Causes
- Seam failure from thermal movement and poor installation
- Flashing deterioration at penetrations and walls
- Vapor barrier breaches allowing moisture from inside the building
- Structural movement cracking the roof assembly at joints
- HVAC condensate line failures that mimic roof leaks
Match your investigation method to the membrane. Thermography is strongest on EPDM and weakest on metal and reflective TPO. Electronic leak detection works on non-conductive membranes only. When in doubt, a core cut at the suspect area confirms what no scanner can.
When to Call a Professional Roofing Contractor
Call a professional when the leak source isn’t obvious within one inspection, when damage spans multiple roof areas, or when structural integrity is in question. Water infiltration that reaches the deck, insulation, or structural members is beyond a maintenance fix.
Signs it’s time to bring in a specialist:
- Leaks recurring in the same area after repair attempts
- Visible sagging, deflection, or soft decking
- Multiple simultaneous leaks across different roof sections
- Warranty implications that require certified repair
- Suspected membrane failure across a large area
Property managers and facility managers overseeing multi-building portfolios who need one coordinated scope covering roofing, insulation, cladding, and drainage.
Frequently Asked Questions
What is the 25 rule in roofing?
The 25% rule applies to roof repairs and replacements under many building codes and insurance policies. If more than 25% of a roof area needs repair in a single year, some jurisdictions require the entire roof section to be brought up to current code. This affects commercial building roof leak investigation because a small leak can trigger a much larger compliance requirement. Check local Texas building codes and your insurance policy language before authorizing partial repairs.
Does commercial insurance cover roof leaks?
Commercial property insurance typically covers sudden, accidental water damage from a roof leak, but excludes damage from deferred maintenance or normal wear. To support a claim, your commercial roof inspection checklist should record the leak’s cause, date discovered, and photographic evidence. Insurers often require a roof inspection report showing the roof was maintained. Without documentation, claims for commercial building roof leak investigation costs and repairs are frequently denied or reduced.
How do you trace a roof leak that isn’t directly above the water stain?
Water travels along roof decking, insulation, and structural members before dripping. Start by mapping all interior stains, then use infrared thermography for roof leaks to identify moisture trails in the roof assembly. Check penetrations, flashing, and seams uphill from the stain. Ponding water and hydrostatic pressure can push water laterally for 20 feet or more. A systematic investigation follows the path from entry point to exit point, not just the visible damage.
How often should a commercial building undergo a roof leak investigation?
Schedule a professional roof leak investigation at least twice yearly, in spring and fall, plus after any major hail or wind event. Facilities with flat roofs, ponding water, or roofs over 10 years old benefit from quarterly checks. A preventative maintenance schedule that includes infrared thermography for roof leaks catches moisture intrusion before it saturates insulation. Between professional visits, facility staff should log any new stains, drips, or membrane damage.
To upload drawings, specs and plans please go to the form on our contact page.
Get in Touch