
Table of Contents
- What Industrial Building Envelope Maintenance Services Cover
- Commercial Building Envelope Inspection Checklist
- Building Envelope Moisture Intrusion Signs You Should Not Ignore
- Industrial Wall Panel Maintenance Tips for Facility Managers
- Preventative Maintenance Plans and Lifecycle Cost Analysis
- Climate-Specific Maintenance Strategies for Texas Facilities
- How Building Envelope Maintenance Services Support Sustainability and ESG Reporting
- Conclusion
- Frequently Asked Questions
Last Updated: September 13, 2026
What Industrial Building Envelope Maintenance Services Cover
Building envelope maintenance is the systematic inspection, repair, and restoration of a facility’s exterior shell, roof systems, wall panels, windows, doors, and below-grade waterproofing. Deferred envelope work can compound into far costlier problems than routine upkeep.
Industrial building envelope maintenance services address the entire exterior boundary separating conditioned interior space from the outside environment:
- Roof membranes and metal roof systems
- Exterior wall panels, cladding, and precast panels
- Windows, curtain wall assemblies, and storefront glazing
- Sealants, expansion joints, and weatherproofing
- Drainage systems, gutters, and scuppers
- Vapor barriers and below-grade waterproofing
The goal isn’t cosmetic. A failing envelope lets in moisture, air, and heat, which drives up HVAC load, degrades insulation performance, and shortens the life of everything inside the building. According to the U.S. Department of Energy’s building envelope research, envelope improvements remain one of the most cost-effective ways to reduce commercial energy consumption.
For facility managers running industrial portfolios, the value is simple: one team handling roof, walls, and drainage instead of three contractors who never talk.
The building envelope is a single system. When roof leaks, wall panel failures, and drainage problems get treated as separate line items, you pay for the same repair twice and miss the root cause.
Commercial Building Envelope Inspection Checklist
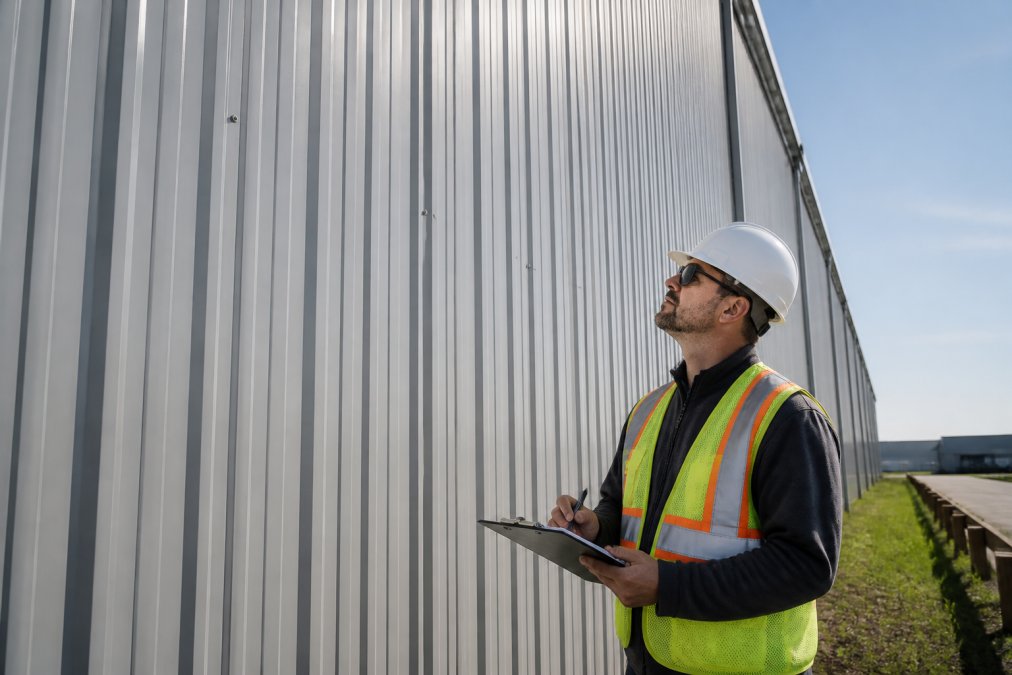
A commercial building envelope inspection checklist is a structured, repeatable set of checkpoints used to assess roof, wall, glazing, and drainage condition before small defects become structural repairs. The best ones are written down, dated, and photographed.
Here’s a common checklist for industrial and commercial properties:
- Roof membrane: check for ponding water, blistering, open seams, and punctures
- Metal roof panels: inspect fasteners, lap seams, and coating wear
- Wall cladding: look for panel deflection, corrosion, and loose fixings
- Sealants and joints: check for cracking, shrinkage, and adhesion loss
- Windows and curtain wall: test for air infiltration and water penetration
- Flashing and copings: verify secure attachment and correct drainage direction
- Gutters and downspouts: confirm free flow and no debris blockage
- Penetrations: check pipe boots, vents, and HVAC curbs for sealant failure
- Interior indicators: look for ceiling stains, musty odors, and rust trails
Where Most Checklists Stop Short
A visual walkthrough only catches surface defects. The problems driving the largest repair bills, trapped moisture behind cladding, thermal bridging, delaminated roof insulation, stay invisible until they cause interior damage. Effective programs pair the checklist with non-invasive diagnostics.
Diagnostic Technology That Changes What You Can Find
Predictive maintenance technology is now mainstream. Commonly deployed tools include:
- Infrared thermography. Handheld or drone-mounted thermal cameras read surface temperature differentials. Wet insulation and trapped moisture show up as cooler or warmer zones because water changes the assembly’s thermal mass, the best tool for finding moisture that hasn’t yet stained a ceiling tile.
- Drone-based roof and façade surveys. Aerial imaging with high-resolution and thermal payloads covers a large roof or tall wall in a fraction of the time a ladder-and-harness survey requires, removing fall-hazard exposure. Drones can’t probe a seam, so findings still need ground verification.
- Moisture meters and capacitance scanners. These confirm what thermography suggests, telling you whether a thermal anomaly is actually moisture or just a reflective surface.
- Sensor-based monitoring. Wireless sensors tracking humidity, temperature, and in some systems strain or vibration flag developing problems between inspections. The value is trend data: a slow rise in wall-cavity humidity points to a sealant or flashing failure long before it becomes a leak.
- AI-assisted image analysis. Software comparing inspection photos across cycles flags changes a human reviewer might miss, such as a sealant crack that has widened by a few millimeters.
A practical program often layers these tools: a drone or thermal survey can identify suspect areas, a moisture meter can confirm them, and hands-on inspection can determine the repair. Skipping confirmation can lead to over-repair; skipping the survey can lead to under-detection.
Timing the Inspection
Timing matters most. Inspections right after a storm reveal defects dry-weather walkthroughs never surface. Pair the annual comprehensive survey with post-storm walkthroughs and, where sensors are installed, continuous monitoring in between.
Photograph every defect from the same angle each inspection cycle. Side-by-side images from six months apart show whether a sealant crack is stable or actively propagating, which is the difference between monitoring and repairing. Thermal images taken from the same drone flight path are even more useful, because they let you compare moisture patterns over time.
Thermal imaging reads temperature, not moisture directly. A dark roof area on a hot afternoon can look like a wet section when it is simply a different membrane color or a shadow. Always confirm a thermal anomaly with a moisture meter before authorizing a repair.
Building Envelope Moisture Intrusion Signs You Should Not Ignore
Building envelope moisture intrusion signs are early indicators that water is entering the exterior assembly; ignoring them is the fastest route to structural deterioration. Common signs include ceiling stains, efflorescence on masonry, rust streaks on metal panels, and musty odors in warehouse space.
Moisture intrusion rarely announces itself. It shows up as small clues that get explained away:
- Brown or yellow staining on ceiling tiles after heavy rain
- White mineral deposits on masonry or precast panels
- Rust trails running down from fasteners or panel seams
- Bubbling or peeling paint on interior walls
- Soft or spongy drywall near windows and doors
- Elevated interior humidity that HVAC can’t control
The insidious part is what happens behind the surface. Water that enters through a failed sealant joint or a compromised vapor barrier can travel laterally along the building assembly, appearing far from the actual entry point. This is why the National Institute of Building Sciences’ guidance on moisture control stresses diagnosing the source, not just the symptom.
Painting over a moisture stain without finding the source traps water inside the assembly. The stain disappears, the damage accelerates, and the eventual repair costs more than the original fix would have.
Industrial Wall Panel Maintenance Tips for Facility Managers
Industrial wall panel maintenance tips start with one principle: keep water out and fasteners tight. Metal wall panels, insulated metal panels, and precast panels fail in predictable ways, and catching failures early extends service life significantly.
Facility managers can handle several checks in-house between professional inspections:
- Walk the perimeter after every major storm and note any displaced or dented panels
- Check fastener heads for backing-out, corrosion, or missing washers
- Look at panel lap seams for sealant cracking or separation
- Confirm gutters and downspouts are clear before rainy season
- Watch for panel oil-canning, which can signal underlying structural movement
For cladding with exposed fasteners, sealant replacement is recurring. Sealants last years, not decades, and Texas heat accelerates degradation (nibs.org). A common mistake is replacing sealant only where a leak appeared rather than systematically across the assembly.
If you manage multiple facilities, standardize your inspection protocol across all sites. Consistent documentation makes it easier to compare conditions, prioritize budgets, and spot recurring defects pointing to a design or installation issue rather than normal wear.
Preventative Maintenance Plans and Lifecycle Cost Analysis
Preventative maintenance plans and lifecycle cost analysis turn envelope upkeep from a reactive expense into a predictable line item. A lifecycle cost analysis (LCCA) compares the total cost of maintaining an asset over its service life against replacing it, including energy, disruption, and downtime. For an industrial envelope, the assets are the roof system, wall cladding, sealants, glazing, and drainage, each with its own service life and failure curve.
The business case is straightforward. Reactive repairs cost more per incident because they happen on someone else’s schedule, often after hours with emergency premiums. Planned maintenance spreads the same work across predictable windows and lets you bundle related tasks.
A practical lifecycle approach includes:
| Decision Factor | Reactive Approach | Planned Program |
|---|---|---|
| Timing | After failure | Scheduled windows |
| Cost predictability | Low | High |
| Disruption to operations | Often severe | Minimized |
| Service life outcome | Shortened | Extended |
| Documentation | Fragmented | Continuous record |
The Cost Drivers an LCCA Has to Capture
Most facility managers build their model around the repair invoice and stop there, understating the real cost of a reactive approach. A defensible LCCA includes:
- Direct repair cost. Labor, materials, access equipment, and permits. Reactive work carries a premium because it’s unscheduled.
- Access cost. Scaffolding, boom lifts, and fall-protection setup can rival the repair cost itself. Bundling repairs into one access event is one of the largest savings a planned program delivers.
- Operational disruption. A roof repair over a production line may require a shutdown, tarp, or inventory relocation. Lost output frequently exceeds the repair invoice.
- Energy penalty. A degraded envelope raises heating and cooling load, a cost that recurs monthly until the defect is fixed.
- Premature replacement. An envelope that fails early forces capital replacement years ahead of schedule, the largest line in most LCCAs and the one most often left out.
- Interior damage. Water intrusion damages inventory, equipment, and finishes. These costs land in a different budget than facilities, which is why they get ignored.
A Simple Framework for Facility Managers
You don’t need a full engineering model. A workable framework:
- Inventory the envelope assets and assign each an expected service life and a current condition rating from your inspection data.
- Estimate the remaining useful life of each asset based on condition, not on age alone.
- Compare two scenarios over a 10- to 20-year horizon: run-to-failure versus a planned program with scheduled interventions.
- Include the indirect costs above, not just the repair line.
- Discount future costs to present value so a repair ten years out is not treated as equal to a repair today.
The output is a single number, the net present value difference between the two scenarios, you can put in front of a capital committee. In most industrial portfolios, the planned scenario wins on total cost even before counting avoided disruption, because access and emergency-premium savings alone are substantial.
Where the ROI Actually Comes From
The return on a planned envelope program isn’t one big number but the sum of several smaller ones: fewer emergency call-outs, fewer access events, longer service life on membranes and cladding, lower energy load, and avoided interior damage. Tracking those categories separately makes the program defensible year over year, because you can show what was avoided, not just what was spent.
Build your lifecycle model around inspection findings, not around a fixed calendar. A facility with severe hail exposure needs a different cadence than one in a sheltered industrial park, even if they’re the same age and construction. Let the condition data set the schedule, and let the schedule set the budget.
A lifecycle cost analysis is not a justification exercise you run after you have decided to fund maintenance. It is the tool that tells you which assets to repair, which to replace, and in what order, so the capital goes where it prevents the most future cost.
Climate-Specific Maintenance Strategies for Texas Facilities
Climate-specific maintenance strategies matter because the same building envelope performs differently depending on where it stands. Texas facilities face a combination that stresses envelope systems from multiple directions.
That combination includes:
- Sustained high heat that accelerates sealant and coating degradation
- Hail events that dent metal panels and crack brittle sealants
- Wide humidity swings that drive expansion and contraction
- Intense rainfall that overwhelms undersized drainage systems
- Freeze events in northern parts of the state that stress joints and membranes
The implication: a generic national schedule under-serves Texas buildings. Sealant replacement cycles need to be shorter, drainage capacity deserves closer scrutiny, and roof systems should be inspected after every significant hail event, not just annually.
If you’re coming from a purely reactive model, expect the first year of a planned program to surface more defects than anticipated. That’s normal, deferred issues become visible once someone looks systematically.
How Building Envelope Maintenance Services Support Sustainability and ESG Reporting
Building envelope maintenance services support sustainability and ESG reporting by improving measured building performance, which feeds directly into the metrics companies now disclose. Energy efficiency, thermal performance, and reduced waste all trace back to envelope condition.
This is the angle most service providers skip. When a building envelope loses air tightness through failed sealants or degraded insulation, HVAC systems work harder, raising energy consumption, which shows up in sustainability reporting.
Envelope work contributes to ESG goals in several concrete ways:
- Reduced heating and cooling demand through restored air and vapor barriers
- Lower thermal bridging across cladding and structural connections
- Extended asset life, which reduces embodied carbon from premature replacement
- Documented maintenance records that support audit and disclosure requirements
For portfolios with sustainability commitments, envelope condition is an asset management issue, not just a facilities issue. Documentation from a structured inspection program gives asset managers the evidence trail they need.
Conclusion
The hardest part of envelope maintenance can be building a program that catches defects before they become emergencies, and documenting it well enough to justify the budget.
Total Cladding and Roofing LLC provides roofing and external cladding services for commercial and industrial properties across Texas, including inspections, leak repairs, preventative maintenance, coatings, restoration, and replacement. We work with metal roofing, flat roof systems, and insulated metal panels, planning around your site operations to minimize disruption. Our team coordinates roof, insulation, wall panel, and drainage work under one scope so you’re not managing three contractors for one problem.
Get started with Total Cladding and Roofing LLC and extend the service life of your building envelope with a maintenance plan built around your facilities.
Frequently Asked Questions
What is included in industrial building envelope maintenance?
Industrial building envelope maintenance covers the roof, walls, windows, doors, and foundation that separate interior space from outside weather. Services typically include roof inspections, sealant replacement, masonry repair, waterproofing, cladding system checks, and drainage clearing. A thorough program also tracks thermal bridging, air infiltration, and vapor barrier condition. The goal is catching small defects before they become structural problems that disrupt operations.
How often should you perform building envelope inspections?
Most industrial facilities benefit from inspections twice a year, plus after major storms. A commercial building envelope inspection checklist should be walked in spring and fall to catch seasonal damage. Roof systems and cladding take the hardest hit from hail, wind, and UV exposure. Facilities in high-storm areas may need quarterly checks. Infrared thermography scans can be added annually to find hidden moisture intrusion behind walls.
What are common signs of building envelope failure?
Watch for water stains on ceilings or walls, musty odors, peeling paint, cracked sealant, rust streaks on metal panels, and visible daylight around windows or doors. Building envelope moisture intrusion signs also include bubbling roof membranes, soft spots in insulation, and higher energy bills. Catching these early lets a maintenance provider repair the specific defect instead of replacing an entire roof system or cladding section.
How does a preventative maintenance plan reduce long-term repair costs?
A preventative maintenance plan spreads small, scheduled repairs across the year instead of waiting for a failure that forces emergency replacement. Regular sealant replacement, drainage clearing, and panel tightening extend lifecycle and avoid water damage to insulation and structural steel. Lifecycle cost analysis usually shows that planned maintenance costs less over 20 years than reactive repairs, because major replacements get delayed and downtime is minimized.
To upload drawings, specs and plans please go to the form on our contact page.
Get in Touch