
Table of Contents
- Why Coordinating Roof and Wall Panel Repairs Matters
- Step 1: Assess Damage and Identify Shared Repair Areas
- Step 2: Establish the Project Sequence
- Step 3: Waterproofing Roof-to-Wall Transitions
- Step 4: Match Materials and Prevent Rework
- Industrial Wall Panel Maintenance Tips After Repairs
- Permitting, Code Compliance, and Long-Term Maintenance
- Frequently Asked Questions
Last Updated: September 21, 2026
Why Coordinating Roof and Wall Panel Repairs Matters
Coordinating roof and wall panel repairs is the practice of planning roof and cladding work as one connected project rather than two separate jobs. The roof-to-wall junction is where most leaks start, and it is the one place neither a roofer nor a panel crew will fully own on their own.
Step 1: Assess Damage and Identify Shared Repair Areas
Start with a full building envelope inspection before anyone quotes a repair. Walk the roof and the walls in the same visit, and photograph every point where the two meet.
- Rusted or lifted flashing at the roofline
- Failed sealant along the head of wall panels
- Loose fasteners on both roof sheets and wall sheets
- Water stains on the underside of the roof deck near walls
- Clogged gutters backing water into the wall system
Metal Building Envelope Inspection Checklist
Use this checklist on every site visit:
- Check roof seams and fastener rows for corrosion
- Inspect flashing at every roof-to-wall junction
- Test sealant for cracking or pull-away
- Look for water infiltration stains inside the building
- Check gutter and downspout flow
- Photograph wall panel dents, holes and corrosion
- Note insulation condition behind any wet panel
- Record all findings with location and date
A common mistake is inspecting the roof one month and the walls the next. By then, the leak has moved and the evidence is gone.
Step 2: Establish the Project Sequence
Sequence the work from the top down, and never repair a wall panel before the roof above it is watertight. Water runs downhill, so the roof is always first.
A workable order looks like this:
- Repair the roof surface, seams and fasteners
- Fix roof-to-wall flashing and closure strips
- Replace damaged wall panels and substrate
- Reinstall insulation and moisture barrier
- Reconnect gutters and drainage systems
- Seal all connection points last
Replacing wall panels before the roof is watertight is the most expensive mistake on these jobs. Water tracks down behind the new cladding and you pay for the same repair twice.
Step 3: Waterproofing Roof-to-Wall Transitions
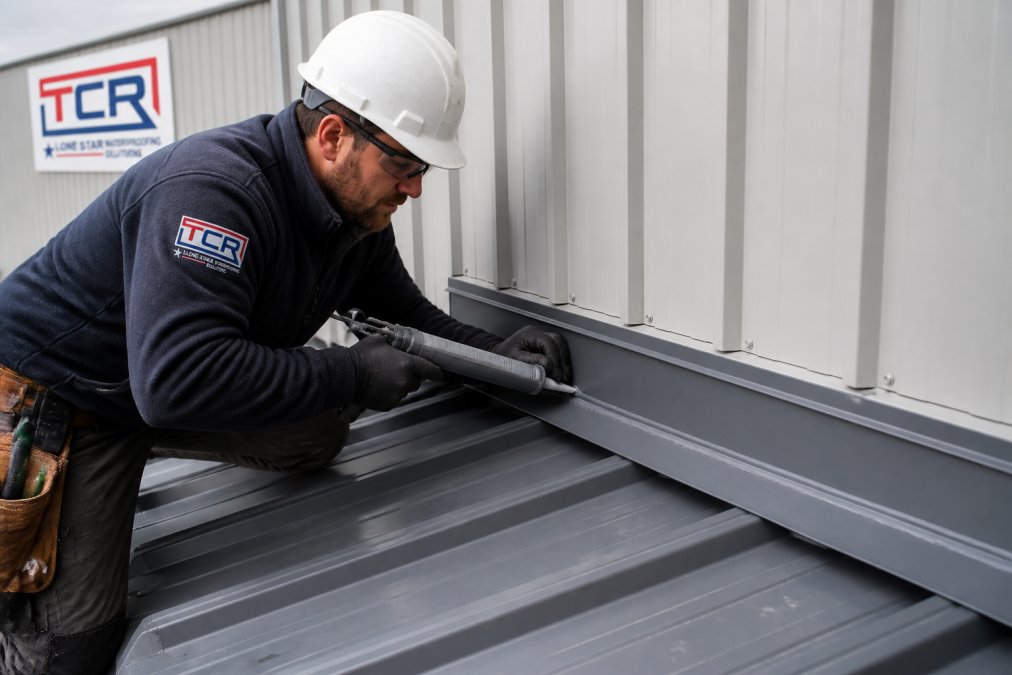
Waterproofing roof-to-wall transitions means sealing the joint where the roof meets the wall with proper flashing, closure strips and compatible sealant. This junction is the leading source of water infiltration on metal buildings, and it fails for a predictable reason: the roof and the wall move differently.
How the Layers Should Stack
Build the junction from the bottom up so gravity always works for you:
- Closure strip, a profiled foam or metal closure that matches the panel rib spacing, filling the gap between the roof sheet and the wall so water and pests cannot pass through.
- Primary flashing, a continuous L- or Z-shaped metal piece, fastened to the wall above the roof line and lapped over the roof sheet.
- Counter-flashing, a second piece that covers the top edge of the primary flashing and ties into the wall panel or substrate.
- Sealant, applied at the lap edges, not as the primary defense. Sealant is a backup, not the waterproofing itself.
Details That Decide Whether It Leaks
- Lap direction: Every horizontal lap must face downhill. Water should run over each piece, never into an exposed edge. A single backward lap turns the whole assembly into a funnel.
- Continuous runs: Use one piece of flashing across the full wall length where possible. Short overlapping pieces create more joints, and every joint is a future leak.
- Fastener placement: Fasten flashing through the high ribs, not the pan, and set fasteners at least 1 inch back from any exposed edge. Overdriven fasteners crush the closure strip and open a path for water.
- Closure strip fit: A closure that does not match the panel profile leaves gaps at every rib. Measure the rib pitch and profile before ordering.
- Sealant choice: Use a neutral-cure silicone or a butyl tape rated for metal roofing. Acrylic or oil-based sealants dry out and pull away within a few seasons on a metal junction.
Apply sealant in one steady bead and tool it smooth so it bonds to both surfaces. A bead laid over dirt or old sealant will fail from the underside.
Why This Junction Fails First
The roof-to-wall transition combines three failure drivers at once: standing water from the roof plane, thermal movement from two different material systems, and the highest concentration of fasteners and laps on the envelope.
Never rely on sealant alone at the roof-to-wall junction. If the flashing and closure strips are not doing the waterproofing, no amount of sealant will hold, and the leak will reappear after the next freeze-thaw cycle.
A Quick Field Test
Before closing up the junction, run a controlled water test. Have one person on the roof direct a hose at the flashing while a second person watches the interior side of the wall for moisture. Test in sections, starting at the low end, so you can isolate the exact point of failure. This takes minutes and catches mistakes that would otherwise show up months later.
Step 4: Match Materials and Prevent Rework
Match new materials to what is already on the building, or the repair will stand out and fail early. Metal roofing and cladding come in specific profiles, gauges and coatings, and mixing them creates problems.
Watch these points:
- Match panel profile and rib spacing to the existing wall
- Use the same metal type to avoid corrosion between dissimilar metals
- Match shingle or panel color as closely as the supplier allows
- Check that fasteners suit the substrate and coating
Photograph the panel profile and any stamps on the back of a sheet before ordering. Suppliers can match a profile far faster from a photo and a code than from a description over the phone.
Industrial Wall Panel Maintenance Tips After Repairs
Once the repairs are done, a simple maintenance schedule keeps them working. Most premature failures come down to missed inspections, not bad materials.
Set a routine:
- Inspect the roofline and wall junctions twice a year
- Clear gutters and downspouts before storm season
- Re-check sealant at flashing and fastener heads each spring
- Touch up scratches and coating damage before rust starts
- Keep a photo log so you can spot changes over time
The single biggest factor in how long a repair lasts is whether anyone inspects it. A twice-yearly walk of the roof and walls catches most problems while they are still cheap to fix.
Permitting, Code Compliance, and Long-Term Maintenance
Check permit and code requirements before work starts, not after. Many roof and cladding repairs need a permit, and structural changes almost always do. Because a coordinated repair touches two building systems at once, it can trigger requirements that a single-trade job would not.
- Whether the repair triggers a permit, and whether the scope crosses more than one trade
- Fire rating requirements for wall cladding, especially where the wall meets the roof line
- Wind uplift ratings for your area, which apply to both roof and wall panels
- Energy code rules if insulation is part of the scope
- Whether a structural change to either system requires stamped drawings
Synchronize the Maintenance Cycle, Not Just the Repair
Most guides stop at the repair. The bigger opportunity is planning the next one. Roof and wall systems age at different rates, and if you inspect them on separate schedules, you will always be reacting to whichever one fails first.
A synchronized maintenance cycle looks like this:
- Twice a year: Walk the roof and the walls in the same visit. Photograph the roof-to-wall junction from the same angles each time so you can compare.
- Before storm season: Clear gutters and downspouts, and re-check sealant at flashing and fastener heads.
- Every three to five years: Have the full envelope assessed by a qualified inspector, including insulation condition behind wall panels and at the roof deck.
- Every five to seven years: Budget for recoating or sealant renewal at the junction, even if no leak is visible.
The Energy Payoff of Doing It Together
A coordinated repair is the cheapest moment to fix thermal bridging at the roof-to-wall junction. That junction is a linear thermal bridge: the framing and flashing conduct heat straight through the envelope, and if insulation is interrupted there, the building loses energy year-round.
- Insulation continuity: Make sure the new insulation meets the existing insulation without a gap at the junction. A gap of even a few inches creates a cold spot where condensation forms.
- Vapor and air barrier alignment: The wall’s air barrier and the roof’s should connect at the junction. If they do not, air leaks carry moisture into the assembly.
Frequently Asked Questions
What are the benefits of coordinating roof and wall repairs simultaneously?
Coordinating roof and wall panel repairs prevents rework, reduces water infiltration risk, and cuts total project time. When both are addressed together, flashing and connection points are sealed once, not twice. Shared repair areas are identified early, and project sequencing keeps trades from undoing each other’s work. This approach also extends the building envelope’s service life and can lower long-term maintenance costs by avoiding repeat visits for related issues.
How do you fix a gap between a roof and a wall panel?
Fix a roof-to-wall gap by cleaning the joint, installing proper flashing, and applying compatible sealant. First, remove old sealant and debris. Then, fit metal flashing that overlaps both the roof and wall panel by at least 4 inches. Secure it with fasteners designed for the substrate. Apply a high-quality sealant rated for exterior use. For large gaps or damaged substrate, replace the affected panel section. Always check for water infiltration signs inside before closing the joint.
What signs indicate that both roof and wall panels need professional inspection?
Signs include water stains on interior walls or ceilings, rust streaks on panels, loose fasteners, sagging rooflines, and visible gaps at roof-to-wall transitions. After hail or high winds, check for dented panels, damaged flashing, and sealant failure. Musty odors or increased energy bills can also point to moisture intrusion. If you notice any of these, schedule a professional inspection of both the roof and wall systems, since damage in one often affects the other.
How does the building envelope affect industrial energy efficiency?
A compromised building envelope allows air leaks and moisture intrusion, forcing HVAC systems to work harder. Gaps at roof-to-wall junctions, failed sealants, and damaged insulation continuity increase thermal bridging. Repairing these issues restores insulation performance and reduces heating and cooling loads. Coordinating roof and wall repairs ensures the entire envelope is sealed, which can lower energy costs and improve indoor comfort for industrial facilities.
To upload drawings, specs and plans please go to the form on our contact page.
Get in Touch