

Table of Contents
- Why Commercial Roof Leak Detection Matters
- Signs and Symptoms of a Commercial Roof Leak
- Tracing the Water Path: From Interior Symptom to Roof Source
- Visual Inspection Methods for Commercial Roof Leak Detection
- Advanced Commercial Roof Leak Detection Tools
- Conducting a Commercial Roof Moisture Survey
- Commercial Roof Inspection Checklist for Facility Managers
- Common Causes and Locations of Commercial Roof Leaks
- Frequently Asked Questions
Last Updated: October 19, 2026
Why Commercial Roof Leak Detection Matters
A commercial roof leak can cost tens of thousands in water damage, equipment failure, and business interruption before anyone notices.
This is where systematic commercial roof leak detection becomes essential. We’ve worked with facility managers across Texas who found that reactive repairs cost three to five times more than proactive detection and maintenance.
Commercial roof leak detection isn’t guesswork. It’s a methodical process combining visual inspection, technology-assisted diagnostics, and an understanding of how water moves through different roof systems, with methods varying by roof type, system age, and leak conditions.
Signs and Symptoms of a Commercial Roof Leak
Water damage inside a building is the most visible sign of a roof leak, but it’s also the last warning you get. By the time interior stains appear, water has already penetrated the membrane, saturated insulation, and traveled through the structure.
Interior water stains and ceiling damage
Interior water stains on ceilings and walls are the most obvious indicator of roof intrusion, appearing as discolored patches often with concentric rings.
Ceiling damage progresses quickly once water reaches interior finishes: drywall softens, acoustic tiles sag, and paint bubbles and peels. In facilities with mechanical systems above the ceiling, water may drip onto HVAC equipment or electrical components, creating immediate operational risk.
Timing matters. Stains appearing after heavy rain or snowmelt indicate active leaks; stains that persist or expand during dry periods suggest water trapped in insulation or structural cavities. This distinction helps narrow the investigation.
Dripping water and moisture on building occupants
Active dripping is an emergency signal, indicating the leak has saturated multiple layers. Occupants may report wet spots on desks, equipment, or merchandise; in warehouses, dripping water can damage inventory, and in manufacturing facilities it can shut down production lines.
Moisture without visible dripping is equally problematic. Humid air, condensation on pipes, or damp spots on walls suggest water is present but hasn’t pooled enough to drip, often meaning water is moving slowly through insulation or trapped in cavities, saturating materials and creating conditions for mold growth.
Tracing the Water Path: From Interior Symptom to Roof Source
Finding the roof entry point requires understanding how water moves through a building. Water doesn’t fall straight down; it follows gravity, surface tension, and structural pathways, often traveling horizontally before dropping through an opening.
Start with the interior symptom and work backward.
Interview building occupants about when they first noticed water, whether it appears after specific weather events, and whether it’s getting worse. This establishes whether the leak is active and seasonal or chronic and worsening.
Inspect the path between roof and symptom for wet insulation, stained structural members, or moisture trails in cavities. In metal-framed buildings, water often follows purlins or structural members before finding an opening.
Visual Inspection Methods for Commercial Roof Leak Detection
Visual inspection is the foundation of commercial roof leak detection, requiring roof access, systematic coverage of suspect areas, and knowledge of where leaks typically occur on different roof systems.
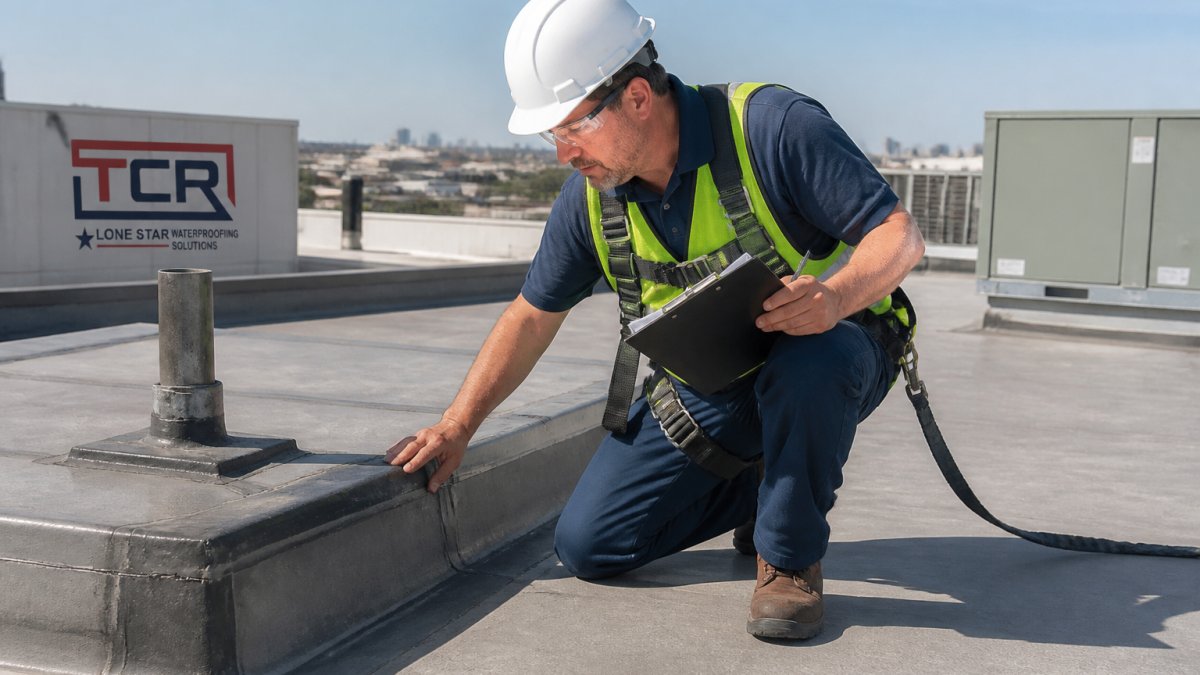
Inspecting the roof membrane for cracks and punctures
The roof membrane is the primary water barrier: single-ply (TPO, EPDM, PVC) or built-up bituminous on flat roofs, metal panels, shingles, or standing seam on sloped roofs.
Pay special attention to high-traffic areas, areas near equipment, and sections exposed to UV damage or thermal stress. Older membranes become brittle and crack more easily, and areas with poor drainage deteriorate faster.
Document all visible damage with photos and measurements to prioritize repairs and confirm whether new damage has developed since the last inspection.
Checking seams, flashing, and roof penetrations
Seams, the joints where two pieces of membrane are joined by adhesive, heat-welding, or mechanical fasteners, are the most common leak source on single-ply membrane roofs.
Inspect seams for separation, adhesive failure or deterioration, and, on heat-welded seams, incomplete welds or cracking.
Flashing is metal or membrane material sealing the roof at walls, parapets, curbs, and other vertical penetrations, and its failures account for a significant portion of commercial roof leaks.
Roof penetrations include vents, skylights, HVAC equipment curbs, and any other roof opening.
On older roofs, previous repairs often indicate problem areas. Patches, reroofing, or replaced flashing are vulnerable to recurring leaks if the underlying cause wasn’t addressed.
Identifying ponding water and clogged drains
Ponding water, standing water remaining after rain, signals poor drainage and accelerates membrane deterioration. Water sitting on the roof more than 48 hours after rain indicates a drainage problem.
Inspect roof drains, gutters, and downspouts. Clogged drains cause water to back up and pond; debris, leaves, and sediment accumulate and block flow.
On sloped roofs, look for areas where water pools due to sagging or settling. Structural deflection or deterioration can create valleys where water accumulates instead of running off.
Ponding also indicates a potential structural issue. If a roof is sagging enough to hold water, the underlying structure may be failing. This requires investigation beyond leak detection.
Advanced Commercial Roof Leak Detection Tools
Visual inspection identifies obvious damage and problem areas. Advanced tools pinpoint moisture within the roof system and confirm leak sources with greater precision.
Infrared thermography for detecting moisture
Infrared cameras detect temperature differences in the roof surface. Wet materials have different thermal properties than dry materials, they retain heat or cool differently depending on conditions.
Thermal imaging is most effective in specific conditions. On clear nights after rain, wet areas cool more slowly than dry areas, creating visible temperature contrasts.
Thermal imaging works best for identifying large wet areas or patterns of moisture saturation. It’s less effective for pinpointing small, isolated leaks.
The advantage is speed and non-invasiveness. Thermal surveys can cover large roof areas quickly without damaging the membrane. The disadvantage is cost and the need for specialized equipment and expertise.
Electronic leak detection and moisture meters
Electronic leak detection uses electrical conductivity to find moisture in the roof system. Moisture increases electrical conductivity in roofing materials. Electronic detectors measure this conductivity and identify wet areas.
Moisture meters provide direct measurement of moisture content in specific materials. They’re useful for confirming whether insulation or structural members are saturated.
Electronic detection is precise and can locate moisture within inches. It’s particularly useful for identifying wet insulation beneath intact membranes or confirming moisture in structural cavities.
These tools are most effective when combined with visual inspection and thermal imaging. Together, they provide a complete picture of where moisture exists and where water is entering the system.
Conducting a Commercial Roof Moisture Survey
A systematic moisture survey documents the condition of the entire roof and identifies problem areas requiring repair. This process combines visual inspection, technology-assisted detection, and detailed documentation.
Begin with a site walkthrough to identify obvious damage, previous repairs, and areas of concern. Photograph the overall roof condition and specific problem areas.
Divide the roof into sections for systematic inspection. Inspect each section thoroughly, documenting findings by location.
Create a detailed report documenting all findings, including photographs, measurements, and recommendations. Prioritize repairs based on severity and urgency.
This survey becomes a baseline for future inspections. Comparing current conditions to previous surveys shows whether problems are stable, improving, or worsening.
Commercial Roof Inspection Checklist for Facility Managers
A structured inspection process ensures consistent coverage and documentation. This checklist guides facility managers through a systematic roof assessment.
Pre-inspection planning and safety procedures
Before accessing the roof, establish a safety plan. Determine who will access the roof and ensure they have appropriate training. Identify fall protection requirements and any equipment needed.
Notify building occupants and operations staff that roof access is planned. Coordinate with maintenance teams to avoid conflicts with other building operations.
Wear appropriate personal protective equipment. Use a safety harness and fall protection if required by regulations or company policy. Wear sturdy footwear with good traction.
Establish a route that covers the entire roof systematically. Plan to inspect all roof sections, not just problem areas. This prevents missing issues in areas that appear undamaged.
Documentation and maintenance records
Document everything systematically. Use a standardized form or checklist so each inspection covers the same elements.
Photograph all areas of the roof, including problem areas and areas in good condition. Take close-up photos of any damage, failed seams, or deterioration.
Record the location and description of all damage. Note the roof section, the type of damage, and the estimated size or severity.
Maintain a running record of all inspections and repairs. Track when damage was identified, what repairs were completed, and when the area was re-inspected.
Use inspection records to plan preventive maintenance. If seams consistently fail in certain areas, plan to replace or reinforce those seams before failure becomes severe.
| Inspection Element | Frequency | Documentation Required |
|---|---|---|
| Visual roof inspection | Annually, plus after storms | Photos, damage log, measurements |
| Membrane condition check | Annually | Cracks, punctures, blisters noted by location |
| Seam and flashing inspection | Annually | Separation, deterioration, previous repairs documented |
| Drain and ponding check | Twice annually | Blockages cleared, ponding areas identified |
| Thermal or electronic survey | Every 3-5 years or as needed | Moisture patterns mapped, wet areas located |
| Maintenance records review | Annually | Repair history analyzed for patterns |
Common Causes and Locations of Commercial Roof Leaks
Understanding where and why leaks occur helps prioritize inspection efforts and guides preventive maintenance decisions.
Seam failures are the leading cause of leaks on single-ply membrane roofs.
Clogged drains and ponding water accelerate membrane deterioration and create conditions for leaks.
Penetrations, vents, skylights, HVAC equipment curbs, are inherent weak points.
Membrane punctures and tears occur from foot traffic, maintenance activities, or weather events.
Previous repairs indicate areas that have experienced problems.
On older roofs, material deterioration is inevitable. Membranes become brittle and crack more easily.
Finding and fixing commercial roof leaks requires systematic investigation, the right tools, and professional expertise.
Frequently Asked Questions
How do you find a leak in a commercial roof?
Start by identifying interior water stains and damage, then trace the water path upward to locate the likely entry point. Perform a visual inspection of the roof membrane, seams, flashing, and penetrations. For hidden leaks, use infrared thermography or electronic leak detection. Document all findings and cross-reference with roof system type and previous repairs to confirm the source.
What are the most common signs of a commercial roof leak?
Interior water stains on ceilings and walls are the primary indicator. Other signs include dripping water, soft or sagging drywall, mold growth, insulation saturation, and equipment corrosion. Exterior signs include visible cracks or punctures in the roof membrane, separated seams, damaged flashing, ponding water, and missing roofing materials. Early detection prevents costly interior property damage.
What tools are used to detect commercial roof leaks?
Visual inspection is the foundation. Advanced tools include infrared thermography cameras, which detect temperature variations indicating moisture; electronic leak detection equipment that identifies electrical conductivity changes; and moisture meters that measure saturation levels in insulation and materials. The choice depends on roof system type, access, and whether the leak source is visible or hidden beneath the surface.
Why does water appear far from the source of a commercial roof leak?
Water follows the path of least resistance, traveling along roof decking, insulation, and structural elements before pooling or dripping at interior locations. On flat roofs with poor drainage or sloped roofs with compromised membranes, water can travel 10-20 feet or more from the actual entry point. This is why tracing the water path and understanding roof structure is critical for locating the true source.
How can facility managers prevent recurring commercial roof leaks?
Implement a preventive maintenance program with regular inspections, documented in maintenance records. Clear drains to prevent ponding water, seal or repair small cracks and punctures promptly, and maintain flashing and penetration seals. After repairs, conduct follow-up inspections to confirm the leak source was addressed. For recurring issues, a professional assessment may reveal underlying structural or drainage problems requiring more comprehensive refurbishment.
When should a commercial roof leak be inspected by a professional?
Inspect immediately after discovering interior water damage or visible roof damage. Schedule routine inspections annually or after severe weather. If a leak recurs after repair, professional assessment is essential to identify the root cause. For flat roofs or systems with ponding water, quarterly inspections help prevent emergency situations. Professional assessment also determines whether temporary repair or comprehensive refurbishment is appropriate.
To upload drawings, specs and plans please go to the form on our contact page.
Get in Touch