


Last Updated: November 9, 2026
Quick Summary
Install perimeter flashing by preparing a clean, dry, sound roof edge, then setting the drip edge and base flashing before terminating the membrane over the flashing flange. Lap membrane strips in the direction of water runoff, seal terminations and fastener heads, and inspect the full perimeter by hand.
- Gather a safety harness, utility knife, seam roller, screw gun, metal snips, and compatible sealant before starting.
- Fastener spacing should follow the edge metal manufacturer’s instructions and local wind requirements.
- Extend membrane past the edge metal by the system maker’s required amount, commonly 1/2 inch to 1 inch.
- EPDM is thermoset and cannot be heat-welded, so seams rely on splice adhesive or tape.
- Inspect the perimeter twice a year and again after any hail or high-wind event.
Table of Contents
- What Perimeter Flashing Does and Why It Decides Whether the Roof Leaks
- Flat Roof Perimeter Flashing Installation: A Step-by-Step Walkthrough
- System-Specific Flashing Instructions for EPDM, TPO, PVC, and Modified Bitumen
- Getting the Flat Roof Flashing Detail Right at Corners, Parapets, and Terminations
- Roof Flashing Maintenance Checklist for Property and Facility Managers
- Flat Roof Leak Repair Costs: Repair, Re-Flash, or Replace?
- Schedule a Perimeter Flashing Inspection With Total Cladding and Roofing LLC
- Frequently Asked Questions
What Perimeter Flashing Does and Why It Decides Whether the Roof Leaks
Perimeter flashing is the metal and membrane edging that seals a flat roof where the field of the roof meets its edges, walls, and penetrations.
On commercial and industrial buildings, the membrane often holds up while the edges fail. Wind can lift the edge, sealant can crack, and water can run backward under the membrane.
Flat roof flashing detail means the complete assembly at any edge or transition. It includes the metal, the membrane strip, the fasteners, and the sealant working as one system.
The 2026 International Roofing Code treats flashing as a required part of weather protection, not an accessory. International Code Council building code resources
The Components of a Flat Roof Flashing Detail
Every perimeter detail is built from the same short list of parts:
- Drip edge: the bent metal at the roof edge that kicks water clear of the fascia
- Base flashing: the membrane or metal turned up at the edge
- Counterflashing: the cap that covers the top of the base flashing
- Copings and gravel stops: edge metal for parapets and gutters
- Sealant and fasteners: the small parts that hold it all together
- Termination bar: the clamped strip that locks the membrane down
You can see the actual copings, drip edges, counterflashings, and edge metal products that make up a flashing detail on the flashings and edge metal page.
Tools, Materials, and Safety Prep Before You Start
Gather these before anyone goes on the roof:
- Safety harness, hard hat, and non-slip boots
- Utility knife, seam roller, and tape measure
- Screw gun with the correct fasteners
- Metal snips and a hand bender
- Membrane cleaner, primer, and compatible sealant
- Membrane rolls and edge metal cut to length
Watch out: never send a crew onto a wet or icy membrane. Single-ply surfaces get slick fast, and a fall from a commercial roof edge is a serious injury.
Flat Roof Perimeter Flashing Installation: A Step-by-Step Walkthrough
Flat roof perimeter flashing installation follows a fixed order: prepare the edge, set the edge metal, terminate the membrane, then seal and inspect. Skipping a step is how edges fail two winters later.
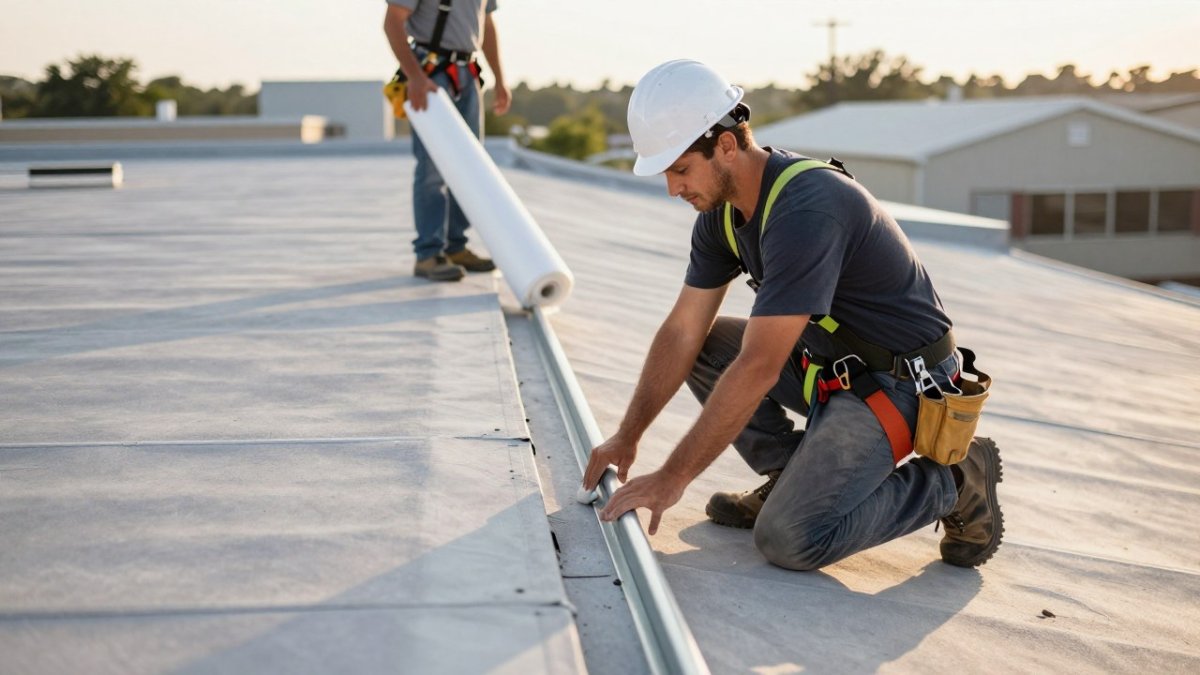
Step 1: Prepare the Roof Edge and Substrate
The edge must be clean, dry, and sound before anything attaches. Sweep off grit. Cut back any blistered membrane. Replace soft or rotted wood at the fascia.
Check that the deck is flat and fastened tight, a wavy edge will not hold a drip edge straight. Measure the perimeter and mark metal cut lengths before lifting anything up.
Confirm the deck accepts the fastener type. Structural concrete, steel, and wood decks each take different fasteners, and the manufacturer’s published pull-out values govern spacing. Gypsum or lightweight insulating concrete usually needs a reinforced attachment or treated wood nailer before metal goes down.
Step 2: Set the Drip Edge and Base Flashing
Set the drip edge first, fastening through the top leg with evenly spaced fasteners and keeping the metal tight to the deck.
For single-ply roofs, a snap-on drip edge saves time. The Anchor-Tite drip edge is made for single-ply systems and locks into the edge without a separate retainer.
Watch out: fasteners set too close to the edge split the deck and give wind uplift a starting point. Keep fasteners back from the fascia line by at least the distance the edge metal manufacturer specifies, and never fasten through a wet or saturated substrate.
Step 3: Terminate and Layer the Membrane
Membrane strips go over the flashing flange, never under it. Lap each strip so water always runs over a seam, not into one. Roll the seam firmly, then seal the termination.
Overlap in the direction of water runoff. Extend the membrane past the edge metal by the amount the system maker requires, commonly 1/2 inch to 1 inch past the drip edge, and reinforce every corner with a pre-cut patch. For adhered single-ply, apply bonding adhesive to both membrane and substrate and allow the published flash-off time before mating. For mechanically attached systems, place the attachment row behind the termination bar, not through the flashing strip.
Step 4: Seal, Fasten, and Inspect the Finished Detail
Sealant is a supplement, not a substitute for correct layering. Apply a compatible sealant at terminations, fastener heads, and corner patches, and tool it so water cannot stand against the edge. Check the full perimeter by hand: lift the edge metal slightly, look for voids under the membrane, and confirm every lap faces the right way. A finished detail should drain freely, show no ponding against the fascia, and hold the membrane tight under the termination bar.
Measurements and Code Considerations
Required edge heights, fastening patterns, and flashing details depend on local code, manufacturer instructions, and design wind speed. The International Roofing Code treats flashing as a required part of weather protection, not an accessory, and the International Code Council publishes the model code text that local jurisdictions adopt and amend. International Code Council building code resources In practice, edge metal height above the roof surface, fastener spacing, and corner reinforcement are set by the membrane manufacturer’s published details and the project’s wind design; do not substitute a generic spacing for the manufacturer’s requirement.
System-Specific Flashing Instructions for EPDM, TPO, PVC, and Modified Bitumen
Each membrane bonds, welds, or seals differently, so the flashing method has to match the system.
| System | Edge Attachment | Seam Method | Termination | Key Check |
|---|---|---|---|---|
| EPDM | Fastened or snap-on edge metal | Splice adhesive and primer | Termination bar or edge retainer | Full contact, no voids |
| TPO | Snap-on or fastened edge metal | Hot-air weld | Weldable-coated termination bar | Weld strength test |
| PVC | Fastened edge metal | Hot-air or solvent weld | Weldable-coated termination bar | Clean, dry surface first |
| Modified bitumen | Nailed edge metal | Torch or cold adhesive | Metal counterflashing over base sheet | No gaps at the lap |
EPDM. EPDM is thermoset, so it cannot be heat-welded. Seams and flashing strips rely on splice adhesive or tape, and both surfaces must be cleaned and primed first.
TPO. TPO is thermoplastic and joined by hot-air welding.
PVC. PVC is also thermoplastic and can be hot-air or solvent welded.
Modified bitumen. Modified bitumen is installed with torch or cold adhesive, and the flashing detail usually combines a base sheet or membrane strip with metal edge flashing and counterflashing.
Accessory compatibility. Sealants, primers, and cleaners must be approved for the specific membrane.
Getting the Flat Roof Flashing Detail Right at Corners, Parapets, and Terminations
Corners and walls are where most perimeter leaks start. Straight runs are forgiving. Corners are not.
At an outside corner, cut a single piece of membrane that wraps the corner in one go. Two pieces butted together will open.
For parapet walls, the PermaSnap coping terminates the flashing at the wall. Where the membrane turns into a wall reglet, the Drive-Lock reglet gives a two-piece counterflashing system that lets you service the roof without cutting the metal.
Best for: buildings with parapet walls and wall reglet conditions.
Skip if: the roof is a simple unparapeted edge with no wall termination.
Roof Flashing Maintenance Checklist for Property and Facility Managers
A roof flashing maintenance checklist turns edge care into a routine instead of an emergency. Inspect twice a year, and again after any hail or high-wind event.
- Walk the full perimeter and look for lifted or loose edge metal
- Check sealant at every corner, penetration, and termination
- Look for cracked or blistered membrane at the flashing line
- Confirm scuppers and drains are clear and water runs off freely
- Tighten or replace missing fasteners
- Photograph any change and log the date
Small fixes caught at inspection can cost far less than repairing water damage inside a building. For a deeper look at stopping leaks before they start, read our guide on how to prevent water ingress in flat roofs.
Flat Roof Leak Repair Costs: Repair, Re-Flash, or Replace?
Flat roof leak repair costs depend on where the leak is and how much of the detail has failed. Pricing depends on roof size, access, and system; contact Total Cladding and Roofing LLC for current pricing or a quote after an inspection. Because the extent of the damage shapes the repair, understanding roof flashing repair methods can help clarify which details need attention before a quote is prepared.
The decision comes down to three questions:
- Is the leak isolated to one flashing detail? Repair that detail.
- Has the perimeter failed along a whole run? Re-flash the run.
- Is the membrane itself failing across the field? Replacement may cost less over time.
Repair it if the membrane is sound and the leak traces to a single edge detail. Replace it if the field is saturated or blistered across large areas. Getting the diagnosis right matters, since repair and replacement costs differ widely.
Schedule a Perimeter Flashing Inspection With Total Cladding and Roofing LLC
Most flat roof leaks start at the edge, and most edge failures are visible long before water reaches the ceiling.
Total Cladding and Roofing LLC provides roofing and external cladding services for commercial and industrial properties across Texas, including inspections, leak repairs, and installation of new roof systems.
The business works with metal roofing, flat roof systems, and insulated metal panels, and can coordinate roof, insulation, and drainage work.
Get started with Total Cladding and Roofing LLC and protect your roof edges before the next storm season.
A failed edge detail rarely announces itself. It shows up as a stain on a ceiling weeks later.
Frequently Asked Questions
What is the purpose of perimeter flashing on a flat roof?
Perimeter flashing closes the gap where the roof membrane meets the edge, parapet, or wall. It sheds water away from the deck, holds the membrane edge down against wind uplift, and stops water from running back under the roofing system. Without it, runoff collects at the lowest point of the edge and works its way into the substrate. On commercial buildings, that path leads to saturated insulation and interior leaks.
What materials are best for flat roof perimeter flashing?
The right material depends on the membrane. EPDM uses uncured EPDM cover strip and splice adhesive. TPO and PVC use heat-welded membrane strips of the same formulation. Modified bitumen uses granulated cap sheet or metal edge flashing set in asphalt adhesive. Metal flashing, typically 24-gauge galvanized steel or aluminum, works on all systems as drip edge and counterflashing. Match the flashing to the membrane so the sealant and welding methods bond properly.
How often should flat roof flashing be inspected for leaks?
Walk the perimeter twice a year, in spring and fall, and after any hail or high-wind event. Focus on corners, terminations, and wall transitions, where most water intrusion starts. Add a check before storm season if the building sits in a hail-prone area. A roof flashing maintenance checklist keeps the inspection consistent across multiple facilities so nothing gets skipped between visits.
Can improper flashing installation lead to structural damage?
Yes. Water that gets past the perimeter flashing soaks the insulation and roof deck, and repeated wetting can rust steel decking and rot wood components. It also weakens fasteners and membrane adhesion, which raises wind uplift risk at the very edge most exposed to it. Catching a failed flashing detail early keeps the fix to a repair rather than a full deck or insulation replacement.

To upload drawings, specs and plans please go to the form on our contact page.
Get in Touch