
Table of Contents
- Why Building Envelope Inspections Matter for Commercial Properties
- What You’ll Need Before You Start Your Inspection
- Step 1: Conduct a Visual Survey of Your Building Envelope
- Step 2: Use Commercial Building Leak Detection Tools
- Step 3: Perform Building Envelope Water Intrusion Testing
- Step 4: Create Your Commercial Building Envelope Inspection Checklist
- Step 5: Document Findings in Your Water Intrusion Inspection Report
- Common Mistakes to Avoid During Building Envelope Inspections
- Frequently Asked Questions
Last Updated: October 10, 2026
Why Building Envelope Inspections Matter for Commercial Properties
A building envelope is the physical barrier that separates the interior of your commercial property from the outside environment. It includes the roof, walls, windows, doors, and foundation. When your building envelope fails, water intrusion occurs, leading to costly damage, mold growth, and structural deterioration.
How to inspect commercial building envelopes for leaks is essential knowledge for property managers and facility teams. Water damage doesn’t announce itself, it hides behind walls and under insulation until the problem becomes severe.
Regular inspections catch problems early. They extend the life of your roofing and cladding systems. They also protect your building’s structural integrity and keep your operations running smoothly.
Building envelope failures cost money. Regular inspections prevent expensive emergency repairs and protect your asset value.
What You’ll Need Before You Start Your Inspection
Before you begin how to inspect commercial building envelopes for leaks, gather the right tools and materials. You’ll need basic safety equipment, inspection instruments, and documentation supplies.
Essential items include:
- Safety harness and fall protection equipment (if accessing heights)
- Binoculars for viewing high areas from ground level
- Flashlight or headlamp for dark spaces
- Moisture meter to detect water in building materials
- Infrared thermometer to identify cold spots indicating air leaks
- Caulk and sealant samples for testing
- Clipboard and inspection forms
- Camera or smartphone for documenting findings
- Ladder for safe access to low-height areas
Schedule your inspection during clear, dry weather. This allows you to see conditions clearly and safely access the building envelope. Plan for 2-4 hours depending on your building size.
Step 1: Conduct a Visual Survey of Your Building Envelope
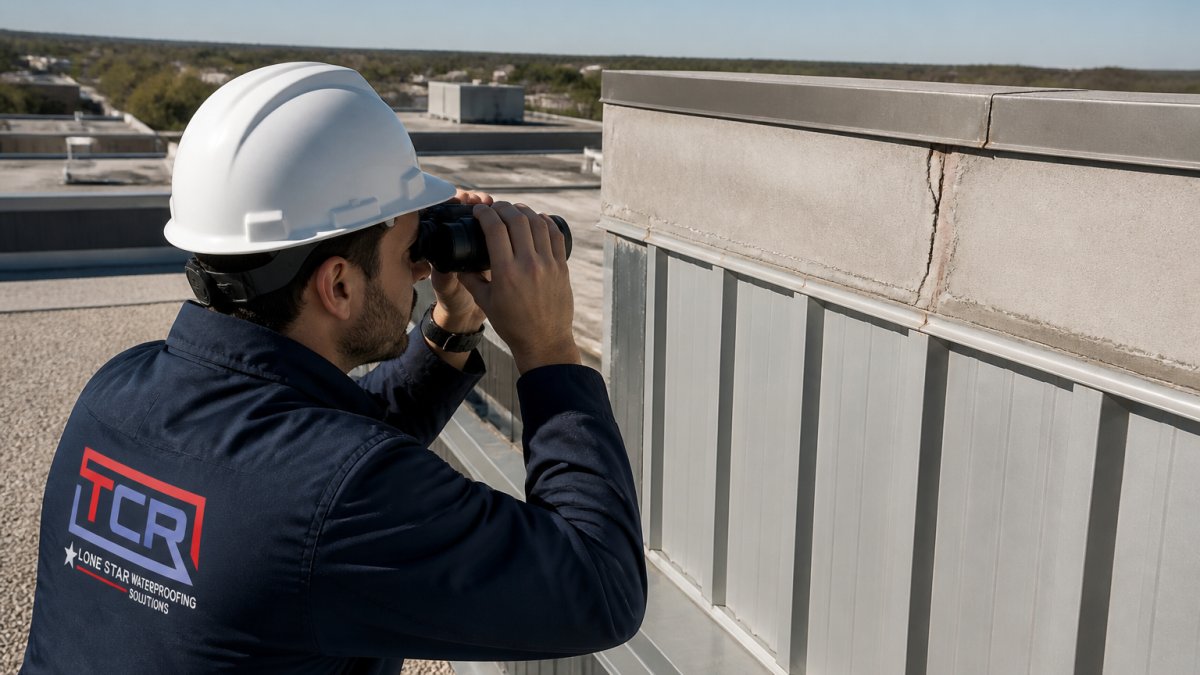
Start with a thorough visual examination of your entire building exterior. Walk the perimeter slowly and look for obvious signs of deterioration, gaps, cracks, and water staining.
Look for these warning signs:
- Cracks in exterior walls or foundation
- Missing or damaged caulking around windows and doors
- Rust stains on metal panels or flashings
- Peeling paint or coating
- Visible water stains on interior walls
- Sagging roof sections
- Damaged or missing roof membrane
- Vegetation growth on roof or walls
- Separation between cladding panels
Document everything with photos. Note the location, size, and severity of each issue. This visual survey provides the foundation for your detailed inspection.
Don’t skip the interior check. Water often travels inside walls before you see exterior damage. Check ceilings, walls, and corners for water marks or discoloration.
Step 2: Use Commercial Building Leak Detection Tools
Moisture meters reveal water hidden inside building materials. These instruments detect moisture before visible mold or rot develops. Press the meter probe against suspect areas, walls, roof sections, and insulation.
Infrared thermometers identify thermal anomalies. Cold spots on exterior walls indicate air leaks or missing insulation. These areas often allow water intrusion because they create condensation points.
Use binoculars to examine high roof sections and wall tops from the ground. This approach keeps you safe while revealing cracks, gaps, and deteriorated sealants that bare-eye inspection misses.
Document all readings and locations. Mark areas requiring closer investigation. These tools transform how to inspect commercial building envelopes for leaks from guesswork into data-driven assessment.
Moisture readings above 20% in building materials indicate active or recent water intrusion. This threshold signals immediate action is needed.
Step 3: Perform Building Envelope Water Intrusion Testing
Building envelope water intrusion testing involves controlled water application to identify leak paths. This method pinpoints exactly where water enters your building.
For this test, use a garden hose or spray equipment to apply water to suspect areas. Start at the lowest point and work upward, mimicking natural water flow. Watch the interior carefully for drips or seepage.
Test each area for 5-10 minutes. Allow time for water to travel through any gaps or cracks. Have a team member inside monitoring for leaks simultaneously.
Document the test results thoroughly. Note which areas leaked, how much water entered, and where water appeared inside. This information guides repair decisions and prioritizes which areas need immediate attention.
Step 4: Create Your Commercial Building Envelope Inspection Checklist
A structured checklist ensures you don’t miss critical areas. Your inspection checklist should cover all building envelope components systematically.
| Component | Inspection Points | Status | Notes |
|---|---|---|---|
| Roof | Membrane condition, flashing, penetrations | ✓ | |
| Walls | Cracks, caulking, panel separation | ✓ | |
| Windows/Doors | Sealant condition, frame gaps | ✓ | |
| Foundation | Cracks, water stains, drainage | ✓ | |
| Flashings | Rust, gaps, proper overlap | ✓ |
Use this checklist for every inspection. Consistency helps you track changes over time and identify patterns. A commercial building envelope inspection checklist becomes your property’s health record.
Step 5: Document Findings in Your Water Intrusion Inspection Report
Your water intrusion inspection report is the official record of your building’s condition. This document guides repair decisions and protects your liability.
Include these sections in your report:
- Inspection date and weather conditions
- Inspector name and qualifications
- Building location and square footage
- Photos of all problem areas
- Moisture meter readings with locations
- Test results and findings
- Prioritized list of repairs needed
- Estimated severity (urgent, moderate, monitor)
- Recommendations for remediation
Professional reporting creates accountability. It also provides documentation if insurance claims or disputes arise later.
A detailed water intrusion inspection report becomes your building’s maintenance roadmap. It justifies repair budgets and prevents costly surprises.
Common Mistakes to Avoid During Building Envelope Inspections
Many facility teams skip the interior inspection. They focus only on what’s visible from outside. Water damage happens inside walls where you can’t see it without looking.
Rushing through inspections causes missed details. Allow adequate time to examine every component thoroughly. Hurried inspections miss small cracks that become major leaks within months.
Ignoring seasonal factors affects your findings. Inspect during different seasons to catch seasonal leaks. Some leaks only appear during heavy rain or freeze-thaw cycles.
Failing to document findings means losing critical information. Without photos and detailed notes, you can’t track whether problems are worsening or improving.
Not testing suspect areas leaves questions unanswered. Visual inspection alone can’t confirm whether a crack actually leaks. Water intrusion testing provides definitive answers.
Skipping the moisture meter step wastes time. These tools quickly identify problem areas, making your inspection more efficient and thorough.
Total Cladding and Roofing LLC helps commercial property owners establish systematic inspection routines. We conduct detailed building envelope assessments using moisture detection equipment and water intrusion testing. We create comprehensive inspection reports that guide repair priorities and protect your building’s long-term performance.
Regular inspections prevent emergency repairs. They extend the service life of roofing and cladding systems. They also minimize disruption to your operations by identifying problems before they become critical.
Building envelope failures create operational chaos and financial loss. How to inspect commercial building envelopes for leaks requires systematic methodology, proper tools, and thorough documentation. Total Cladding and Roofing LLC brings specialized inspection expertise developed through extensive refurbishment experience. We assess your building’s condition, explain findings clearly, and recommend solutions tailored to your specific situation. Contact Total Cladding and Roofing LLC to schedule a professional building envelope inspection and protect your commercial property.
Frequently Asked Questions
How do you inspect a commercial building for water leaks?
Start with a visual survey of the entire building envelope, including roof edges, wall penetrations, and flashing. Use moisture meters and thermal imaging to detect hidden water intrusion. Perform water spray testing on suspect areas to observe how water flows. Document all findings with photographs and measurements. A thorough inspection combines visual assessment, detection equipment, and controlled water testing to identify both visible damage and concealed moisture.
What should be included in a commercial building envelope inspection checklist?
Your checklist should cover roof condition and drainage, wall cladding and sealants, window and door frames, penetrations for pipes and conduits, flashing at transitions, gutters and downspouts, and interior signs of moisture damage. Include sections for recording moisture readings, thermal anomalies, visual damage, and test results. Note the date, weather conditions, and inspector name. Photograph each problem area with reference measurements, and record GPS coordinates or building section references for clarity.
What tools do professionals use to find leaks in a commercial building envelope?
Moisture meters detect water in materials without breaking the surface. Thermal imaging cameras reveal temperature differences caused by moisture or air leaks. Water spray equipment allows controlled testing of suspect areas. Borescopes inspect cavities and hidden spaces. Smoke pens trace air leakage paths. Inclinometers measure roof pitch and drainage slope. A calibrated light meter helps assess sealant coverage.
When should a commercial building envelope be tested for water intrusion?
Schedule inspections annually, after severe weather events, following building modifications, and when you notice interior moisture or staining. Test water intrusion before major renovations to establish a baseline. For buildings in harsh climates or with known problem areas, quarterly inspections catch deterioration early. After repairs, perform testing to verify the fix worked. Many property managers schedule inspections in spring to assess winter damage and again in fall before heavy rain and freeze-thaw cycles.
To upload drawings, specs and plans please go to the form on our contact page.
Get in Touch