


Table of Contents
- Understanding Water Ingress vs. Harmless Ponding on Flat Roofs
- Step 1: Conduct a Flat Roof Inspection Checklist
- Step 2: Maintain Flat Roof Drainage Systems
- Step 3: Repair the Flat Roof Membrane
- Step 4: Apply Protective Coatings and Sealants
- Commercial Roof Maintenance Schedule and Best Practices
- When to Call a Professional: Safe Limits and Urgent Escalation
- Frequently Asked Questions
Last Updated: October 13, 2026
Understanding Water Ingress vs. Harmless Ponding on Flat Roofs
Understanding how to prevent water ingress in flat roofs starts by recognizing that water pooling on a flat roof doesn’t always mean water ingress is happening.
The practical distinction: water sitting a few hours or a day after rain with no interior leaks points to a drainage issue, not membrane failure.
At Total Cladding and Roofing LLC, we assess this during inspections by examining membrane condition, checking for active leaks, and evaluating drainage.
Step 1: Conduct a Flat Roof Inspection Checklist
A thorough inspection is your first defense against water ingress, but “walk the roof and look around” is not a process.
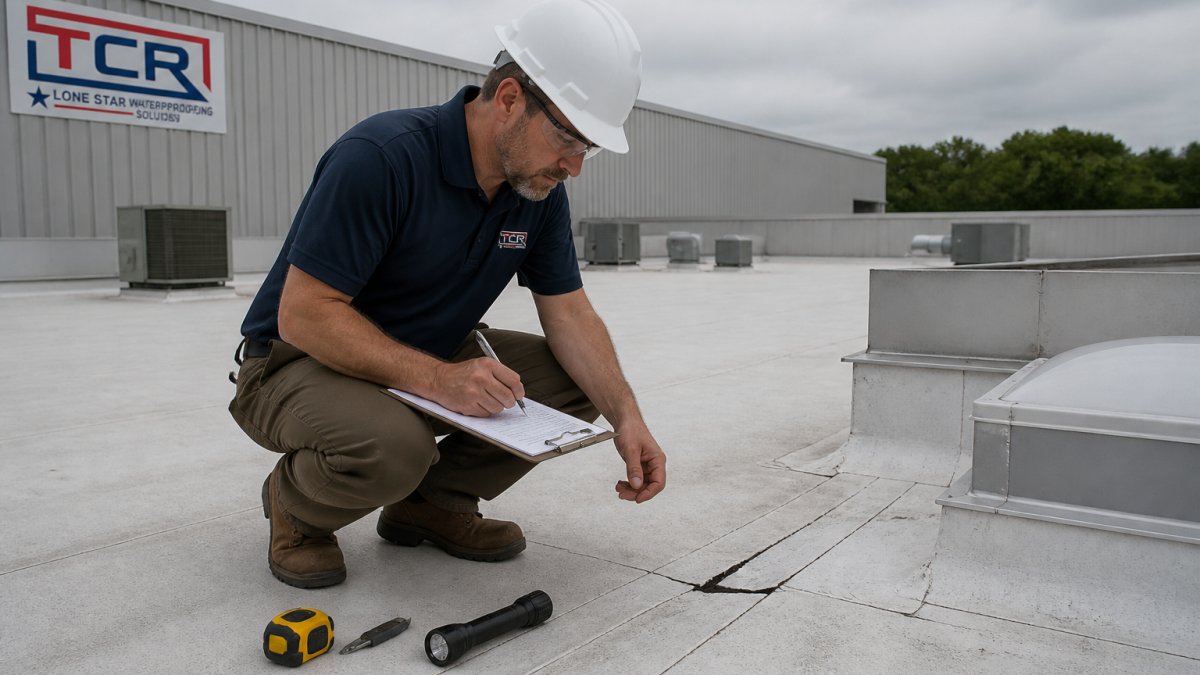
Tools and preparation
A practical kit includes:
- A notepad or phone-based inspection log (date, weather, roof temperature, areas observed)
- A chalk or lumber crayon to circle suspect areas so you can find them again
- A flat pry bar or dull putty knife to probe soft spots gently
Do not walk a flat roof alone, in high wind, or when the membrane is wet enough to be slippery. Most flat-roof injuries are slip-and-fall events, not structural collapses.
The inspection sequence
Run the same order every time:
- Perimeter and edge metal first. Look for lifted edge flashing, open laps, and fasteners backing out. Water that gets behind edge metal rarely shows up as a ceiling stain until it has traveled several feet inward.
- Drains and scuppers. Confirm the strainer is seated, the bowl is clear, and the outlet is not blocked. A drain that looks fine from above can be blocked at the leader below.
- Seams. Walk every seam, not just the ones near the leak. Run a hand along the lap and feel for a raised edge, a gap, or a soft spot.
- Penetrations. Every pipe boot, vent stack, HVAC curb, and conduit penetration gets the same treatment: check the sealant bead, the clamp ring, and the flashing skirt.
- Field membrane. Look for blisters, wrinkles, fishmouths, punctures, and any area where the membrane has pulled away from the substrate.
- Interior check. Before you leave the building, look at the underside of the roof deck from inside, ceiling tiles, structural members, insulation, and the top of any wall where the roof meets a parapet.
The ponding-versus-ingress test
This is the step most guides skip. After a rain, note the time and mark the water line with a crayon. Check again at 24 and 48 hours.
- Water gone within 48 hours, no interior signs: this is a drainage or slope issue, not a membrane failure. Address the drainage before you spend money on membrane work.
- Water still present at 48 hours: the roof is not meeting the drainage intent of its design. Standing water accelerates membrane aging even if it has not leaked yet.
- Water gone, but interior stains, musty odor, or a moisture-meter reading above the surrounding area: water is entering somewhere. The source may not be directly above the stain, water follows framing and insulation.
Photograph the same four or five reference points on every inspection. Comparing this month’s photo to last month’s is the fastest way to catch a slow change in slope, seam condition, or flashing.
Visual inspection of membrane and seams
Walk the entire membrane surface systematically, looking for cracks, tears, blistering, or areas where the membrane has lifted or separated.
Pay close attention to seams, where two sections of membrane join. They are common failure points because they experience movement from temperature swings and building settling.
Check for debris accumulation. Leaves, dirt, and organic matter trap moisture against the membrane.
Checking flashing and roof penetrations
Flashing seals where the roof membrane meets walls, pipes, vents, and equipment.
These areas are vulnerable because they interrupt the continuous membrane, and water naturally finds its way in at these points.
Inspect all flashing for:
- Rust or corrosion (especially on metal flashing)
- Gaps or separation from the wall or equipment
- Missing or damaged sealant
Check the sealant around each penetration. If sealant is cracked, missing, or pulling away, water will follow that path into the building.
Document the condition and location of every penetration. This becomes your repair priority list.
What to write down
A useful inspection log has five columns: date, location, observation, action taken, and follow-up date. Without the follow-up column, small findings quietly become large ones. Keep the log with the roof warranty paperwork so a future contractor can see the roof’s history.
Step 2: Maintain Flat Roof Drainage Systems
Learning how to prevent water ingress in flat roofs requires understanding that poor drainage is the fastest path to it. If water can’t leave quickly, it sits, and sitting water finds weaknesses in the membrane.
Clearing gutters, downspouts, and roof drains
Clogged gutters and downspouts are the most common cause of ponding.
Inspect gutters quarterly, especially after storms and in fall when leaves accumulate.
Check downspouts for blockages by disconnecting them temporarily and running water through.
Roof drains need the same attention: remove debris around the drain opening and clean any strainer or basket regularly. Monthly maintenance prevents emergencies.
Improving roof slope and correcting low spots
Flat roofs aren’t perfectly flat. They have a slight slope (called “fall”) designed to move water toward drains.
Walk the roof after rain: where water sits marks your low spots, either original design issues or caused by structural settling over time.
Minor low spots can be built up with tapered insulation or leveling compound. Major slope problems require resurfacing or structural correction, professional work.
Step 3: Repair the Flat Roof Membrane
Small membrane damage caught early prevents water ingress from spreading. But repairs must be done correctly or they’ll fail and you’ll face the same problem again.
Identifying and sealing small tears and cracks
Cracks and small tears allow water to penetrate. If the damage is minor and the membrane is otherwise sound, sealing may be sufficient.
Clean the area thoroughly. Remove dirt, algae, and loose material. Dry the surface completely, wet surfaces won’t seal properly.
Use a roof-rated sealant or patch kit appropriate to your membrane type. Different membranes (EPDM, TPO, PVC) require different products.
Monitor the area during the next rain.
Addressing seam failures and reinforcing fabric damage
Seam failures are more serious than small cracks. If a seam is separating or leaking, the repair is beyond simple sealant application.
Seam repairs typically require removing a section of membrane, cleaning and drying the substrate, and re-sealing with heat (TPO, PVC) or adhesive (EPDM), specialized equipment and training.
These repairs are labor-intensive and demand precision, professional work. DIY seam repair usually creates worse problems.
Step 4: Apply Protective Coatings and Sealants
Reflective coatings reduce heat absorption, lowering cooling costs and slowing UV degradation.
Sealants applied to the entire membrane surface create a protective barrier, typically every 3-5 years as preventive maintenance.
Coating application requires clean, dry conditions and proper surface preparation.
Total Cladding and Roofing LLC assesses whether coatings make sense for your roof type and climate.
Commercial Roof Maintenance Schedule and Best Practices
Preventive maintenance is far cheaper than emergency repairs. A structured schedule keeps problems small.
Routine inspections and preventive maintenance frequency
Inspect your flat roof at least twice per year: spring (after winter) and fall (before winter). After severe storms, inspect immediately.
Monthly visual checks from ground level or accessible areas take 30 minutes and catch problems early.
Clean gutters and remove debris quarterly, or monthly if trees surround the building. Seal coating or re-sealing should occur every 3-5 years depending on climate and membrane type.
Seasonal considerations and debris removal
Winter brings ice dams and snow load issues; spring thaw can reveal leaks that developed under snow.
Summer heat accelerates membrane degradation. Check for blistering and UV damage after hot seasons.
Fall debris clogs drainage systems quickly, clean gutters and drains before winter arrives.
Hot-cold cycles in spring and fall stress seams and penetrations, making these seasons good times for detailed inspections.
When to Call a Professional: Safe Limits and Urgent Escalation
Know the boundary between maintenance you can handle and work requiring professionals, misjudging it costs money and creates safety risks. The harder question is not just when to call, but how to tell whether the last repair actually worked.
What you can safely do yourself
- Walk the roof and document conditions, provided fall protection is in place and the membrane is dry
- Clear debris from gutters, drains, and scuppers by hand or with a scoop
- Remove leaves and dirt from the membrane surface
What you should not attempt
- Seam repairs or membrane patching, which require heat-welding equipment (TPO, PVC) or specific adhesives (EPDM) and a trained hand
- Structural repairs, resurfacing, or tapered insulation work
- Any work at heights without compliant fall protection
If you see sagging, a spongy deck, or a visible change in the roof plane, stay off the roof. That is a structural question, not a maintenance question.
Urgent escalation triggers
Call a professional the same day if you observe any of the following:
- Water staining, bubbling paint, or a musty odor on interior ceilings or walls
- Soft spots or spongy areas on the membrane or deck
- Widespread blistering or membrane separation
Repair verification: how to know it worked
A repair that looks fine the day it’s installed can fail after the first thermal cycle. Verify in three stages:
- Immediate. After the repair cures, run a hose on the area for 15-20 minutes and watch the interior below. No drip, no stain, no meter change.
- First rain. Check the same interior location within 24 hours of the next significant rain. Compare moisture-meter readings to your pre-repair baseline.
- 30-day and seasonal follow-up. Recheck at 30 days, then again after the first hard freeze and the first hot spell. Thermal movement is what reopens marginal repairs.
If the same area leaks twice, stop repairing and start diagnosing. Recurring water usually means the source isn’t where the water appears, it’s traveling along a seam, fastener line, or framing member from elsewhere on the roof.
Long-term monitoring
Keep a simple log with three data points per inspection: date, moisture-meter reading at each reference point, and any change in ponding behavior. Over a year, that log tells you whether the roof is stable or slowly degrading.
Total Cladding and Roofing LLC provides inspections that identify the actual condition of your roof system, assessing whether repairs will extend service life meaningfully or whether replacement is the better investment.
Frequently Asked Questions
What causes water to pond on a flat roof, and how do I know if it’s a problem?
Water accumulation happens when roof slope is inadequate, drains are blocked, or low spots develop in the membrane. Short-term ponding after heavy rain typically drains within 48 hours and is harmless. Water ingress occurs when ponding persists longer, water enters the building interior, or the membrane shows visible damage. Check interior ceilings and walls for water stains, soft spots, or mold, these indicate actual ingress requiring immediate repair.
How often should a flat roof be inspected to prevent water ingress?
Inspect flat roofs twice yearly, spring and fall, plus after severe weather. Commercial properties with high traffic or nearby trees should inspect quarterly. Each inspection should check for debris accumulation, membrane damage, clogged drains, and flashing separation. Document findings with photos to track changes over time. Regular inspections catch small problems before they become costly water damage.
What’s the difference between flat roof membrane repair and full resurfacing?
Membrane repair addresses isolated damage: small tears, seam failures, or localized deterioration. These repairs extend the roof’s service life when the overall membrane is still sound. Resurfacing applies a new coating layer or replaces sections of failed membrane across larger areas. A professional inspection determines which approach fits your roof’s condition and age. Repair is typically more cost-effective for minor damage, while resurfacing becomes necessary when damage is widespread or the membrane is nearing end of life.
Can I prevent water ingress in a flat roof myself, or do I need a professional?
Routine maintenance, clearing gutters, removing debris, and inspecting for obvious damage, is safe for property managers to perform. However, membrane repairs, flashing work, and coating application require specialized knowledge and equipment. Improper sealing or patching can trap moisture and worsen problems. Professional inspection identifies hidden damage you cannot see. If you discover active leaks, membrane tears, or widespread ponding, contact a roofing contractor immediately rather than attempting DIY fixes.
To upload drawings, specs and plans please go to the form on our contact page.
Get in Touch