


Last Updated: October 23, 2026
Quick Summary
How to prevent wind uplift on flat roofs involves three primary methods: fully adhered systems that bond the entire membrane to the substrate, mechanically attached systems using fasteners with zone-specific spacing, or ballasted systems using weight to hold the membrane in place. Proper attachment must match your location’s design wind speed, with fastener spacing tighter in corner and perimeter zones where uplift forces are highest.
- Corner zones experience uplift forces three to five times higher than field zones and require fasteners every 6-12 inches
- ASCE 7 design wind speed depends on geographic area, exposure category, building height, and roof zone classification
- Fully adhered systems provide the highest uplift resistance, while mechanically attached systems cost less but require periodic fastener inspection
- Seams are the weakest points in roof assemblies and must be properly sealed and reinforced to prevent wind separation
- Inspect roofs twice yearly and immediately after high-wind events, looking for lifted membrane, loose fasteners, and flashing damage
Table of Contents
- Understanding Wind Uplift on Flat Roofs
- Flat Roof Wind Uplift Requirements and Building Codes
- Assessing Your Roof’s Vulnerability to Wind Uplift
- Flat Roof Membrane Attachment Methods
- Step-by-Step Prevention Checklist
- Wind Uplift Roof Inspection and Post-Storm Response
- Flat Roof Maintenance After High Winds
- Frequently Asked Questions
Understanding Wind Uplift on Flat Roofs
Wind uplift is the upward suction force wind creates on flat roof surfaces, capable of peeling a membrane from its substrate, which is why understanding how to prevent wind uplift on flat roofs is essential.
The most common failure isn’t catastrophic storms alone, it’s roofs never properly designed or attached for their location’s wind loads.
How wind creates pressure and suction on roof surfaces
Wind doesn’t flow evenly over a flat roof.
This pressure difference intensifies at corners and edges, where suction is highest, making edge failure a common failure mode.
Building height matters too: wind accelerates as it moves upward, so a 40-foot warehouse roof faces different wind loads than a 10-story office building at the same location.
Why flat roofs are vulnerable to uplift forces
Flat roofs are inherently vulnerable to wind uplift because they lack the sloped surface that sheds wind forces.
The membrane, whether fully adhered, mechanically attached, or ballasted, must resist these forces.
Seams are another vulnerability, the weakest points in the roof assembly. If not properly sealed and reinforced, wind can separate them, allowing water infiltration and further membrane separation.
Flat Roof Wind Uplift Requirements and Building Codes
Building codes exist to prevent wind uplift failures, setting minimum design wind speeds and attachment requirements based on location, building height, and roof zone classification. Ignoring them puts your building at risk and may violate local code.
ASCE 7 design wind speed standards
ASCE 7 (American Society of Civil Engineers Standard 7) is the national standard governing wind load calculations, defining design wind speed for your location based on historical wind data.
The design wind speed depends on:
- Basic wind speed for your geographic area (Texas ranges from 90 mph to 140 mph depending on location)
- Exposure category (urban, suburban, or open terrain)
- Building height and dimensions
Each zone experiences different uplift forces: corner zones see the highest pressures, sometimes 50% higher than field zones, with perimeter zones in between.
ASCE 7 also accounts for topographic effects: buildings on hills or ridges see increased wind speeds, valleys see decreased speeds.
Local building code compliance in your area
Local Texas building codes reference ASCE 7 but may impose stricter requirements based on regional wind history, as some jurisdictions updated their codes after damaging hail or wind events.
Before designing or retrofitting a roof, you must:
- Verify the design wind speed for your address and building height
- Identify your exposure category based on surrounding terrain
- Determine roof zone classifications (field, perimeter, corner)
Use a commercial roof inspection checklist to verify compliance with building codes and identify vulnerabilities.
Code compliance isn’t optional, it’s a baseline for safety and insurance coverage.
Assessing Your Roof’s Vulnerability to Wind Uplift
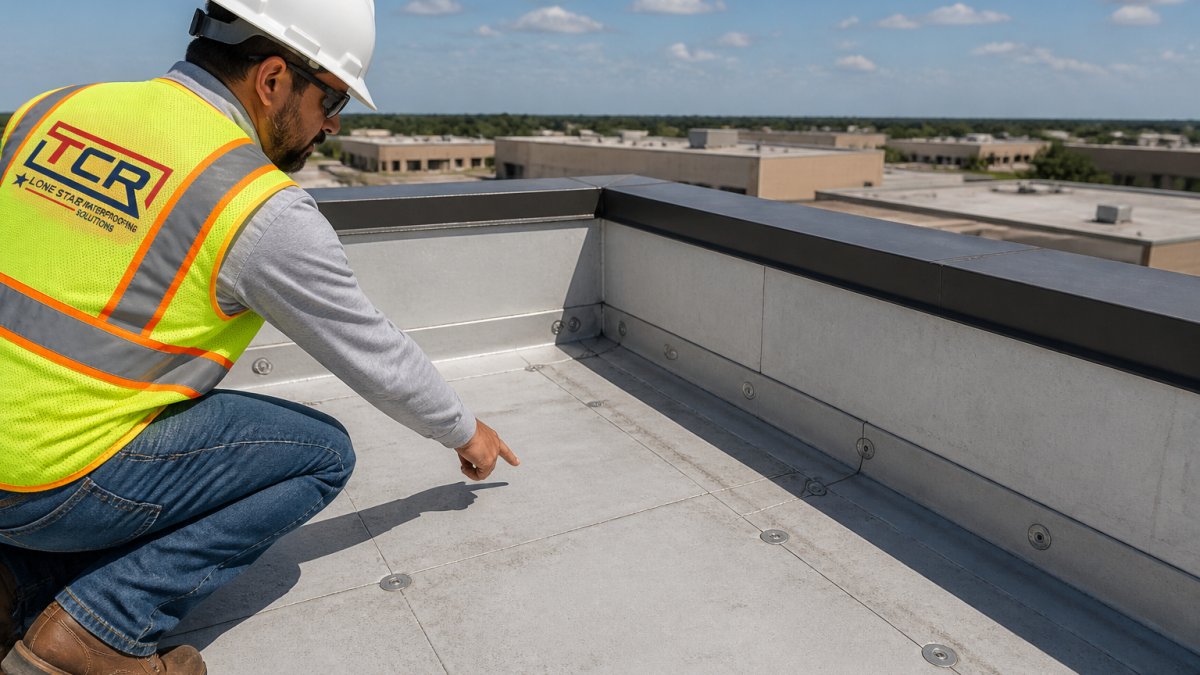
Before you can prevent wind uplift, you need to understand which parts of your roof are most at risk. Edges and corners face pressures three to five times higher than the field.
Identifying high-risk zones: edges, corners, and perimeters
Wind uplift risk concentrates in three distinct zones:
Corner zones experience the highest uplift forces, typically the first 2-4 feet inward from roof corners. Wind hitting a corner creates a vortex that dramatically increases suction, and this is where failures start.
Perimeter zones run along roof edges (excluding corners), extending 2-4 feet inward depending on building height and dimensions. They experience elevated uplift, though less extreme than corners.
Field zones are the flat center areas, experiencing the lowest uplift forces. They still require proper attachment, just less critical than perimeter and corner zones.
Roof penetrations (vents, pipes, chimneys, HVAC units) create their own uplift risk zones. Wind flows around these obstacles and creates localized suction.
Evaluating wind exposure and building height factors
Your building’s exposure category determines how much wind acceleration occurs around it. ASCE 7 defines three:
Exposure A (urban centers with tall buildings): wind slowed by surrounding structures, lowest design wind speeds.
Exposure B (suburbs, light industrial areas): moderate exposure, where most Texas facilities fall.
Exposure C (open terrain, agricultural areas, coastal zones): minimal obstruction, highest design wind speeds and greatest uplift risk.
Surrounding terrain also affects wind flow: buildings on hilltops or ridges experience wind acceleration, valleys experience deceleration, and elevated terrain increases your design wind speed.
Flat Roof Membrane Attachment Methods
How your roof membrane is attached to the substrate determines whether it stays in place during high winds. Three primary methods exist, each with different uplift resistance and cost.
Fully adhered roofing systems
Fully adhered systems use continuous adhesive to bond the entire membrane to the substrate (typically insulation or a concrete deck), creating a continuous bond that resists uplift across the entire roof surface.
Advantages of fully adhered systems:
- Highest uplift resistance of all attachment methods
- No fasteners to maintain, replace, or worry about corroding
- Excellent for retrofit applications where penetrating the roof is not desired
Disadvantages:
- Higher installation cost due to labor-intensive adhesive application
- Requires proper surface preparation and weather conditions during installation
- Substrate must be clean, dry, and sound for adhesive to bond properly
Fully adhered systems are ideal for buildings in high-wind exposure areas or for retrofit projects where you want to avoid fastener penetrations.
Mechanically attached systems and fastener patterns
Mechanically attached systems use fasteners (usually screws with large washers or plates) to secure the membrane to the substrate.
The fastener pattern is critical. In corner zones, fasteners might be spaced every 6-12 inches.
Advantages of mechanically attached systems:
- Lower material cost than fully adhered
- Faster installation in many cases
- Easier to repair or replace membrane sections
Disadvantages:
- Fasteners create penetrations that must be sealed
- Fasteners can corrode over time, especially in harsh climates
- Requires periodic inspection to ensure fasteners remain tight
Mechanically attached systems work well for new construction where design specifications are clear and for facilities where cost is a primary concern.
Ballasted systems for retrofit applications
Ballasted systems use weight (typically pavers or concrete blocks) to hold the membrane in place rather than adhesive or fasteners, creating friction that resists uplift forces.
Advantages of ballasted systems:
- No fastener penetrations needed
- No adhesive application required
- Simple to install
Disadvantages:
- Requires significant dead load (weight) to achieve uplift resistance
- Increases structural load on the building (may not be acceptable for older buildings)
- Ballast can shift during high winds if not properly configured
Ballasted systems are often used for retrofit applications on buildings where penetrating the roof is not acceptable and where the building structure can handle the additional weight.
Step-by-Step Prevention Checklist
Learning how to prevent wind uplift on flat roofs requires a systematic approach. Follow these steps to assess your roof, identify vulnerabilities, and implement proper attachment.
Step 1: Review manufacturer specifications and roof assembly design
Start by gathering documentation on your roof assembly:
- Original roof specifications or construction drawings
- Manufacturer’s installation instructions for your specific membrane type
- Roof assembly design showing membrane type, insulation, substrate, and attachment method
Review the manufacturer’s specifications for uplift resistance. Manufacturers test roof assemblies and rate them for specific wind speeds; yours should be rated for at least your location’s design wind speed.
Check whether your current attachment matches the manufacturer’s specifications. Fasteners spaced too far apart or undersized may not meet the rated wind speed.
Step 2: Zone-specific fastening and attachment guidance
For each zone, determine the required fastener type, size, and spacing:
- Corner zones: Typically require fasteners every 6-12 inches
- Perimeter zones: Typically require fasteners every 12-18 inches
- Field zones: Typically require fasteners every 18-24 inches
Use fasteners appropriate for your substrate. Concrete decks require different fasteners than wood or metal decks. Fastener washers or plates must be large enough to distribute load without tearing the membrane.
If your current fastening doesn’t match these requirements, plan for retrofit fastening. This involves adding additional fasteners in areas where spacing is inadequate.
Step 3: Seal membrane seams and reinforce flashing
Seams are critical weak points. Inspect all seams for:
- Proper sealing (no gaps or voids)
- Adequate overlap (typically 4-6 inches for heat-welded seams)
- Reinforcing tape or secondary sealing
Reinforce seams in high-stress areas with additional sealing tape or adhesive. Seams at roof edges and around penetrations should receive extra reinforcement.
Flashing is equally important. Check all flashing for:
- Proper fastening and adhesive application
- Sealing at all seams and overlaps
- Adequate height above the membrane (typically 12 inches minimum at edges)
Reinforce flashing seams and fasteners in corner and perimeter zones where uplift forces are highest.
Step 4: Secure roof penetrations and rooftop equipment
Every roof penetration (vent, pipe, chimney, HVAC unit) creates an uplift risk zone. Secure penetrations by:
- Using properly designed flashing for each penetration type
- Fastening flashing with fastener patterns appropriate for the uplift zone
- Sealing all flashing seams with compatible sealant
Rooftop equipment (solar panels, satellite dishes, HVAC units) must be securely attached to the roof structure, not just sitting on top of the membrane.
Use vibration isolation pads or equipment frames that distribute loads across multiple fastening points. Each attachment point should be fastened according to zone requirements.
Wind Uplift Roof Inspection and Post-Storm Response
Regular inspections catch problems before they become failures. Post-storm inspections identify damage that needs immediate repair.
Scheduled inspection frequency and what to look for
Inspect your roof at least twice per year, once in spring and once in fall. Additional inspections after high-wind events are essential.
During inspections, look for:
- Lifted or billowing membrane, any areas where the membrane is not lying flat against the substrate
- Loose or missing fasteners, fasteners that have backed out or are missing entirely
- Separated or peeling seams, membrane seams that are lifting or separating
Document findings with photos and measurements. Note the location, size, and severity of any issues.
Identifying failure signs: lifted membrane, loose fasteners, and flashing damage
Early warning signs of wind uplift failure include:
Lifted membrane edges, if you can slip your hand under the membrane at edges or around penetrations, the attachment is failing. This requires immediate attention.
Flashing separation, flashing that has lifted away from the membrane allows wind to get underneath.
Visible wear patterns, areas where the membrane is rubbing or moving show that the attachment is inadequate.
If you observe any of these signs, schedule professional inspection and repair immediately.
Flat Roof Maintenance After High Winds
Post-storm response is critical. The hours and days immediately after high winds determine whether minor damage becomes major failure.
Immediate post-storm assessment and temporary repairs
Within 24 hours after high winds, conduct a visual inspection from the ground or using binoculars. Look for:
- Visibly lifted membrane or flashing
- Missing sections of membrane or flashing
- Debris damage to vents or penetrations
If you identify damage, do not wait for a full professional inspection. Storm damage roof restoration services in San Antonio Texas provide fast repairs for hail, wind, and water damage to commercial and industrial roofs. Temporary repairs can prevent water infiltration:
- Use roofing tape or temporary sealant to seal any visible seams or gaps
- Weight down lifted membrane edges with sandbags or temporary ballast (do not create new penetrations)
- Cover damaged areas with tarps, secured with weights, not fasteners
These are temporary measures only. Schedule professional repair within 48-72 hours.
Long-term maintenance schedule to prevent recurrence
After repairs are complete, establish a maintenance schedule to prevent recurrence:
- Monthly: Visual inspection for debris, water pooling, or visible damage
- Quarterly: Detailed inspection of seams, flashing, and fasteners in high-risk zones
- Annually: Full roof inspection by a qualified professional
Keep detailed inspection records. This documentation helps identify trends (certain areas failing repeatedly) and informs future repair or replacement decisions.
Schedule preventive maintenance before severe weather seasons.
Consider upgrading attachment methods in areas that have failed repeatedly.
Total Cladding and Roofing LLC specializes in wind uplift assessment and retrofit on commercial and industrial roofs across Texas.
| Prevention Method | Best For | Uplift Resistance | Installation Cost |
|---|---|---|---|
| Fully adhered system | High-wind areas, retrofits | Highest | Higher labor |
| Mechanically attached | New construction, moderate wind | High | Moderate |
| Ballasted system | Retrofits where penetrations not allowed | Moderate | Lower material |
| Reinforced seams and flashing | All roofs | Moderate | Varies |
Fastener spacing in corner zones is often 50% tighter than field zones. Check your manufacturer’s specifications for zone-specific requirements, using field-zone spacing in corner zones is a common mistake that leads to failure during high winds.
Lifted membrane edges during calm weather indicate your attachment system is already compromised. Do not wait for the next storm, water infiltration and structural damage accelerate once the membrane lifts. Address this immediately.
EXTERNAL CITATIONS:
This article references ASCE 7 wind load design standards for buildings, the national standard that governs how design wind speeds and uplift forces are calculated for your specific location and building type. According to FEMA guidance on wind damage mitigation for commercial buildings, properly specified roof attachment methods are the single most effective way to prevent wind uplift failure. The National Roofing Contractors Association technical guidelines on membrane attachment provide detailed specifications for fastener patterns and spacing by roof zone, which form the basis for code-compliant roof design in most jurisdictions.
Frequently Asked Questions
What causes wind uplift on a flat roof?
Wind uplift occurs when wind flows over and around a flat roof, creating lower pressure on the windward side and suction forces on the leeward side. These pressure differences generate uplift forces that can separate the roof membrane from the substrate. Corner zones, roof edges, and perimeter areas experience the highest uplift forces. Building height, surrounding terrain, and local wind exposure also amplify uplift risk. Without proper fastening and adhesive systems, these forces can lift membrane sections or pull entire roofing systems off the roof deck.
How should a flat roof membrane be secured against wind?
Flat roof membranes can be secured using three primary attachment methods: fully adhered systems use continuous adhesive to bond the membrane to the substrate; mechanically attached systems use fasteners in specific patterns, with higher density in corner and edge zones; ballasted systems use weighted materials like gravel or pavers. Your choice depends on local building code wind ratings, ASCE 7 design wind speed requirements, roof assembly specifications, and whether you’re installing new or retrofitting existing roofs. Zone-specific fastening is critical, corner and perimeter zones require more fasteners than field zones to resist concentrated uplift forces.
How often should a flat roof be inspected for wind damage?
Inspect your flat roof at least twice yearly: once in spring after winter weather and once in fall before storm season. Additional inspections are essential after high-wind events, severe storms, or hail. During inspections, look for lifted or billowed membrane sections, loose or missing fasteners, separated seams, damaged flashing, and debris accumulation around roof penetrations and equipment. Early detection of these failure signs allows you to make repairs before wind uplift becomes severe and causes water infiltration, structural damage, or complete membrane failure.
What is the 25% rule for roofing?
The 25% rule refers to damage assessment guidance used to determine whether a roof should be repaired or replaced. If wind uplift or other damage affects 25% or more of the roof’s total area, replacement is often more cost-effective and provides better long-term protection than patching. If damage is less than 25%, targeted repairs to affected zones, such as re-adhering lifted membrane, replacing damaged fasteners, or sealing compromised seams, may extend the roof’s service life. However, this rule is not universal; your specific situation depends on roof age, membrane condition, local code requirements, and manufacturer specifications.

To upload drawings, specs and plans please go to the form on our contact page.
Get in Touch