Last Updated: November 3, 2026
Quick Summary
Tilt wall testing checks whether a concrete panel, its connections, and the building frame can still carry their design loads. The process moves from drawings and visual walks to connection inspection, concrete strength testing, and corrosion scans, then ranks each panel by risk. Inspect tilt walls at least once a year and after any major event.
- Panels usually fail at connections, not the concrete face, so inspect base plates, anchors, and roof ties first.
- Scan panels with a cover meter before drilling to avoid hitting rebar and weakening the wall.
- Compare cracks and panel tilt to thresholds, not gut feeling, and send failures to a licensed engineer.
- Inspect tilt walls at least once a year and again after storms, impacts, or sudden cracking.
- Rank every finding as high, medium, or low risk so owners know what to fix now.
Table of Contents
- Structural Integrity Testing for Industrial Tilt Walls: What the Process Proves
- Step-by-Step Structural Integrity Testing Protocol
- Industrial Tilt-Up Wall Inspection Checklist for Field Use
- Tilt-Up Concrete Wall Cracks: Structural Defect or Cosmetic Issue?
- Connection Inspection: Foundation, Roof, and Building Frame
- Tilt-Up Wall Inspection Frequency and Event-Triggered Testing
- Building a Tilt-Up Wall Inspection Report Template That Holds Up
- Scheduling a Tilt-Wall Structural Assessment for Your Facility
- Frequently Asked Questions
Structural Integrity Testing for Industrial Tilt Walls: What the Process Proves
Tilt wall testing for industrial structures is the process of checking whether a concrete panel, its connections, and the building frame can still carry the loads they were designed for. At Total Cladding and Roofing LLC, we treat it as a decision tool, not a box to tick. The goal is a clear answer: is this wall safe, and what needs fixing first?
Tilt-up construction is common across Texas warehouses and plants because it goes up fast and lasts. But panels crack, connections loosen, and sealants fail. Testing tells you which of those problems threaten the structure and which are just surface wear.
Below, we walk through how panels carry load, the testing steps, the tools involved, and how to document what you find. The process we describe follows ACI 551.2R, Guide for Tilt-Up Concrete Panels and standard structural evaluation practice.
How Tilt-Up Panels Carry Load and Where They Fail
A tilt-up panel is a precast concrete wall poured flat, then lifted into place. Each panel carries two kinds of load: gravity from its own weight, and lateral loads from wind. It passes both into the foundation below and the roof frame above.
Where do panels fail? Usually at the connections, not the concrete face.
- Panel-to-foundation connections take the most stress
- Panel-to-roof ties resist wind uplift
- Joints and sealants fail first, letting water in
- Cracks near connection points signal movement
A common mistake is judging a wall by its surface. To spot these failure modes in the field, review the warning signs of structural failure. A clean-looking panel can hide a loose connection behind it. That is why a walk-around is only the start.
Step-by-Step Structural Integrity Testing Protocol
Here is the workflow we use for tilt wall testing. It moves from cheap and visual to detailed and instrumented, so you only pay for advanced testing where it is needed.
- Gather drawings and history. Collect panel layout, connection details, and any past repair records.
- Walk the exterior. Map cracks, joint gaps, and staining on every panel.
- Walk the interior. Check the same panels from inside for cracks and water signs.
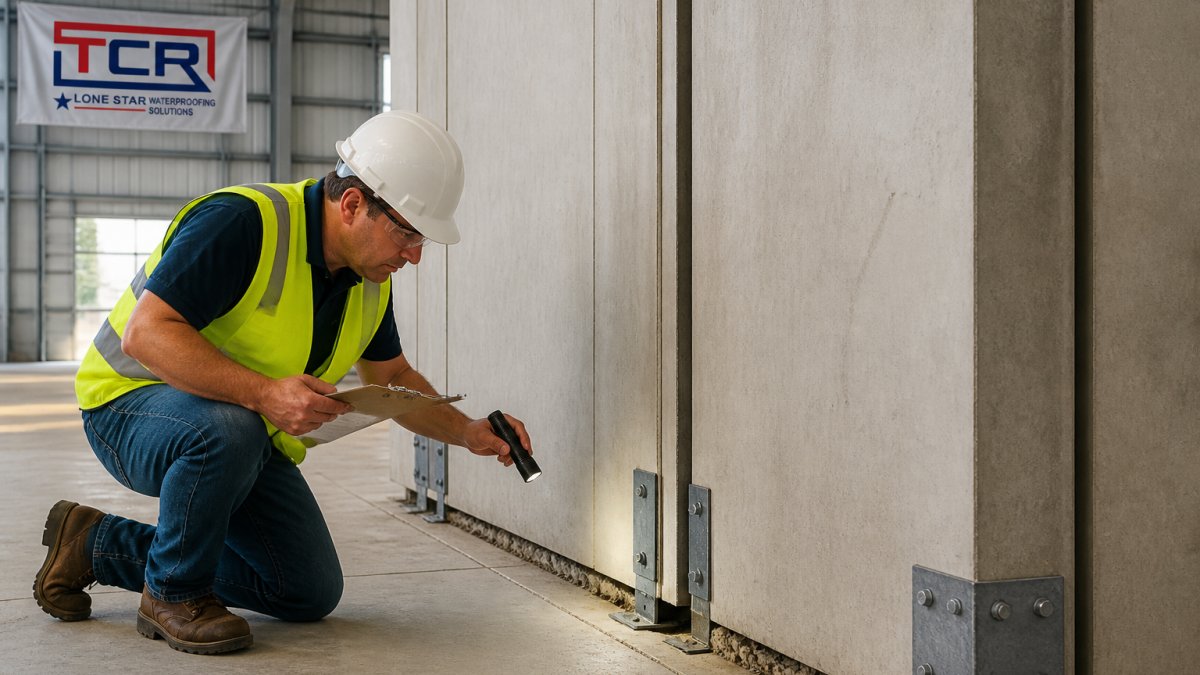
- Inspect connections. Look at base plates, anchors, and roof ties.
- Test concrete strength. Use rebound or core sampling where the drawings are missing.
- Check for corrosion. Scan reinforcement near wet or cracked areas.
- Rank the findings. Score each panel by risk and recommend repairs.
Test Methods, Equipment, and What Each One Establishes
No single test proves a wall is sound. Each method answers a different question. The table below shows what each one can and cannot tell you.
| Method | Equipment | What It Establishes |
|---|---|---|
| Visual inspection | Eyes, camera, crack gauge | Surface cracks, joint gaps, staining |
| Rebound hammer | Schmidt hammer | Relative surface concrete strength |
| Core sampling | Core drill | Actual concrete strength |
| Cover meter | Electromagnetic gauge | Rebar depth and spacing |
| Half-cell test | Corrosion meter | Risk of active corrosion |
| Laser survey | Total station | Panel tilt and movement |
A common mistake is skipping the cover meter and drilling straight into a panel. You can hit rebar and weaken the wall. Always scan before you drill.
Acceptance Criteria and Measurable Thresholds
How do you know a crack is a problem? You compare it to a threshold, not a gut feeling. Two measurements matter most: crack width and panel movement.
- Crack width: Hairline cracks are usually cosmetic. Wider cracks that keep growing point to movement or overload.
- Panel tilt: A panel leaning beyond its design tolerance needs engineering review.
- Joint gap: Gaps that grow season to season suggest foundation or connection issues.
- Concrete strength: Results below the original design strength flag a panel for closer study.
The American Concrete Institute publishes the reference standards engineers use to set these limits. We do not set them ourselves. Any panel that fails a threshold goes to a licensed engineer for a written opinion before repair.
Industrial Tilt-Up Wall Inspection Checklist for Field Use
Print this list and take it on site. It keeps a walk-around consistent from panel to panel.
- Number and photograph every panel
- Map each crack and record its width
- Check joint sealant for gaps and cracking
- Look for rust stains and water tracks
- Inspect base plates and anchor bolts
- Check roof ties and frame connections
- Note any panel tilt or bowing
- Record efflorescence and spalling
- Photograph all findings with a scale reference
- Flag panels for engineer review
Anyone climbing or working near roof edges needs the right fall protection. Review these safety protocols for commercial roof access before field work.
Tilt-Up Concrete Wall Cracks: Structural Defect or Cosmetic Issue?
Most tilt-up concrete wall cracks are cosmetic, but some are not. The difference comes down to width, direction, and whether the crack is still moving.
Cosmetic cracks are narrow, stable, and often shrink-related. Structural cracks are wider, follow stress lines near connections, and grow over time. Here is how to tell them apart:
- Cosmetic: hairline, stable, no rust staining, no water entry
- Structural: wide, growing, near connections, rust or water present
- Moisture-related: staining, efflorescence, sealant failure
If you are unsure, treat the crack as structural until an engineer says otherwise. When cracks need real repair, the appropriate fix depends on the findings of the assessment. Readers can learn how wall panel repair services actually fix them.
Connection Inspection: Foundation, Roof, and Building Frame
Connections are where tilt walls fail, so inspect them first. Check the foundation anchors, the roof ties, and the frame attachments on every panel you can safely reach.
- Foundation: look for base plate corrosion, loose anchors, and cracked grout
- Roof: check tie-downs, embed plates, and any pulling away from the frame
- Frame: look for gaps where panels meet steel
Watch out: a loose roof tie can let a panel shift in high wind. That is a safety issue, not a maintenance item. When roof and wall problems overlap, plan them together.
Tilt-Up Wall Inspection Frequency and Event-Triggered Testing
Inspect tilt walls at least once a year, and again after any major event. For broader planning, see this commercial roof inspection guide for Texas buildings. A yearly visual walk catches most problems early. Events that should trigger a fresh inspection include:
- Hail or severe storm damage
- A vehicle impact on a panel
- Visible cracking that appeared suddenly
- Water intrusion after heavy rain
- Any panel that looks like it has moved
Building a Tilt-Up Wall Inspection Report Template That Holds Up
A good tilt-up wall inspection report template turns findings into decisions. It should let a reader see which panels are urgent and which can wait. Build it around these fields:
| Field | Purpose |
|---|---|
| Panel ID | Tracks each panel over time |
| Finding type | Crack, corrosion, connection, movement |
| Severity rank | High, medium, low |
| Photo reference | Proves the finding |
| Recommended action | Repair, monitor, engineer review |
Rank every finding by risk. High-risk items get fixed now. Medium items get monitored. Low items go on the maintenance list. This ranking is what makes the report useful to owners and managers.
Scheduling a Tilt-Wall Structural Assessment for Your Facility
Structural integrity testing for industrial tilt walls works best as a planned assessment, not a scramble after a failure. Start with a visual walk, then bring in testing where the findings point. That keeps the scope tight and the answers clear.
At Total Cladding and Roofing LLC, we assess your panels and connections, explain the options, and plan the work around your operations. Our team brings refurbishment experience from the UK to Texas industrial buildings, and we coordinate roof, wall, and drainage work.
Contact Total Cladding and Roofing LLC for a quote or to discuss your facility’s needs.
Frequently Asked Questions
Are tilt-up walls load bearing?
Tilt-up panels are load-bearing elements in most industrial buildings. They carry roof and floor loads down to the foundation, resist wind and lateral loads, and transfer those forces through connections at the base and roof line. That is why tilt wall testing looks at the whole load path, not just the concrete face. A visible crack or a loose connection can interrupt that path, so panel assessment has to include foundation connections, roof connections, and the building frame, not just the panel surface.
What defects should an industrial tilt-wall inspection look for?
An industrial tilt-up wall inspection checklist should cover cracks wider than 0.3 mm, spalling and exposed reinforcing steel, rust staining that suggests corrosion, panel movement or rotation, failed joint sealant, water intrusion, and loose or corroded connection hardware. It should also note construction quality issues like honeycombing and poor consolidation. Each defect gets measured, photographed, and ranked by severity so the engineering evaluation can separate structural weaknesses from cosmetic or moisture-related problems.
When should tilt-up concrete walls be inspected?
Baseline inspection at handover, then routine visual inspection every 12 months for most industrial facilities. Event-triggered testing applies after hail storms, vehicle impacts, earthquakes, or any observed panel movement. Tilt-up wall inspection frequency should tighten to every six months for buildings over 25 years old or those showing active cracking. Cracks or movement in tilt-up wall panels should be assessed by a licensed structural engineer, not just a contractor, because the cause often sits in the connections rather than the concrete.
How do you document a tilt wall structural assessment?
A tilt-up wall inspection report template should record panel IDs, defect locations mapped to elevations, crack widths and lengths, connection conditions, test results, photographs, and a risk ranking for each finding. It should end with repair recommendations and a re-inspection date. Documentation matters because it creates a traceable history: if a panel’s crack width grows from 0.4 mm to 1.2 mm over two years, that trend is the evidence that drives a structural repair decision.

To upload drawings, specs and plans please go to the form on our contact page.
Get in Touch