Creative Design Leak-Tite Coping
- Manufacturer
- Metal-Era
- Product
- Creative Design Leak-Tite Coping
- Status
- Current
- Market
- United States
- Latest revision
- H
- Latest file date
- June 20, 2023
- Last verified
- October 14, 2026
Overview
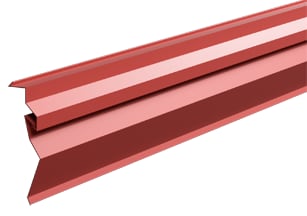
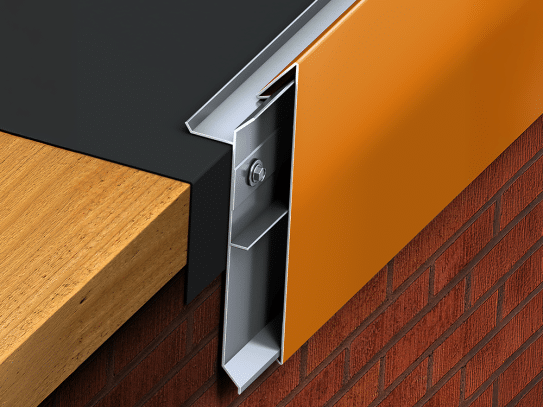
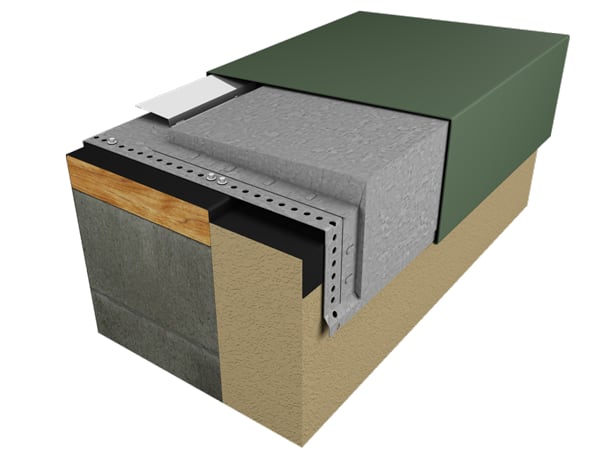
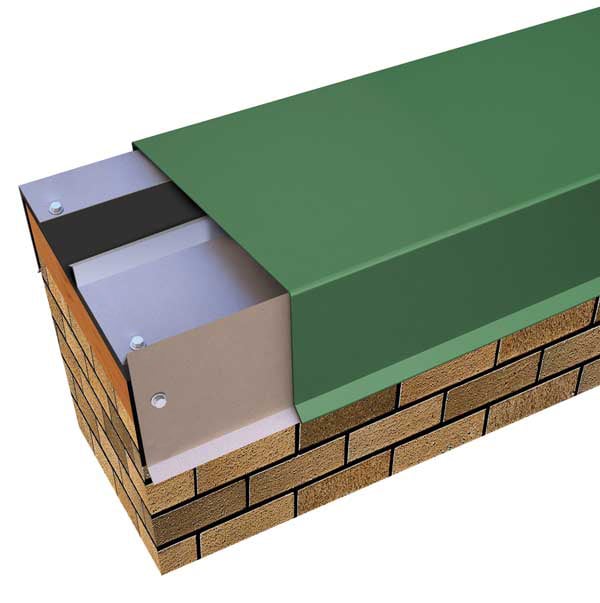
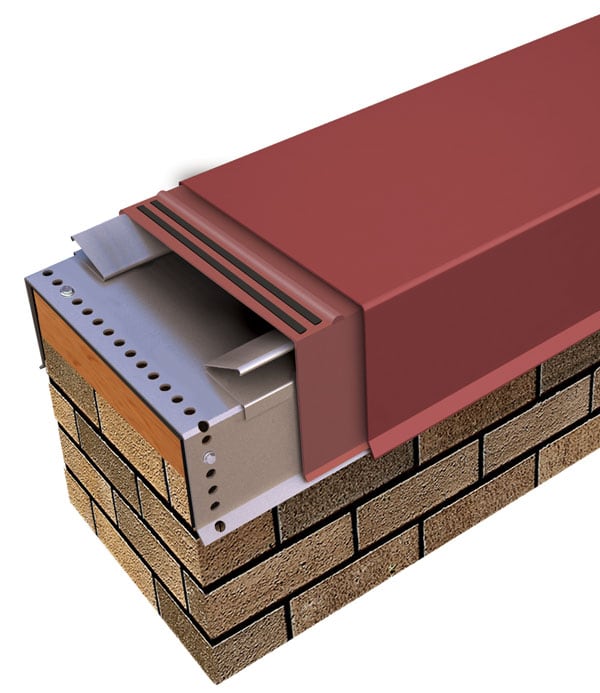
Leak-Tite Coping is a snap-on metal coping from Metal-Era's Creative Design Series, made to cap a parapet wall. Covers come in 12-foot lengths and are held by 12-in.-wide anchor clips fastened to the top of the wall. No crimping is done and no adhesives are used. The series is aimed at buildings such as financial institutions, universities, schools and churches.
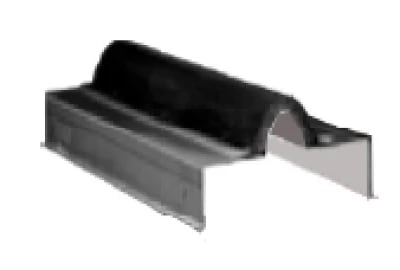
The feature that gives the product its name is a formed raised rib on either side of each cover joint. The ribs are part of an 8-in.-wide splice plate that sits under every joint between covers and carries two factory-applied sealant strips.
Leak-Tite is one of six versions in the Creative Design Series coping line, alongside Bold Face, Bullnose, Reveal, Cornice and Stone-Look. Among those six, Leak-Tite is the one rated with FM Approved and Miami-Dade County Approved status. As perimeter metal, it finishes the edge of low-slope roof assemblies where the membrane turns up and over a parapet.
Sizes and wall dimensions
The cover is sized to the wall it caps. A 3/8-in. space is built in to take up variations in the actual wall width. Two different upper limits are given for the wall, and both are stated here.
- Wall size: 3 1/2 in. minimum and 39 7/8 in. maximum, with testing carried out up to 16 in.
- Outside face: 3 in. minimum and 12 in. maximum, tested to 12 in.
- Inside face: 2 1/4 in. minimum and 12 in. maximum, tested to 4 in.
The outside face has a 1 3/8-in. dimension and the top of the inside face has a 15/16-in. dimension.
Data sheets and technical documents
Current files
Archived files
No older reviewed revisions are archived for this product yet.
Cover materials and finishes
Covers are formed from galvanized steel or aluminum:
- 24-gauge steel
- 22-gauge steel
- .040-in. aluminum
- .050-in. aluminum
- .063-in. aluminum
For Creative Design Leak-Tite Coping, standard colors are coil-coated and carry a 30-year Kynar 500 finish warranty. On Creative Design Leak-Tite Coping, custom post-coated Kynar 500 colors include a 10-year finish warranty, and a 20-year warranty is available on request. Anodized finishes carry a 5-year warranty. Coil-anodized finishing has no warranty, and post-coat Class 1 batch anodizing can be raised from 5 to 10 years for an upcharge.
Ten express colors are offered: Almond, Bone White, Cityscape, Clear Anodized, Dark Bronze, Medium Bronze, Sandstone, Sierra Tan, Slate Gray and Stone White. All colors are also offered in a mill finish.
Splice plates, anchor clips and fasteners
Each splice plate is 8 in. wide and has a formed raised rib on either side of the joint. Two strips of factory-applied isocryl butyl sealant, a non-curing type, run across the plate. The plates are concealed under the cover and ship with the coping.
Anchor clips are 12 in. wide and galvanized. Corrosion-resistant stainless-steel springs are attached to the clips at the factory and give positive spring loading to the cover once it is snapped on. Clip spacing is set by Metal-Era, and the installation drawing for a typical wall shows clips at 4 ft. on center. Fastening holes are pre-punched and slotted, which allows for thermal movement.
Fasteners are provided with the order. The substrate is specified as wood, masonry or metal, and wood fasteners are supplied when no substrate is given.
Testing and approvals
Leak-Tite is tested to ANSI/SPRI/FM 4435/ES-1, is FM Approved and is Miami-Dade County Approved. The print approval drawing is marked ANSI/SPRI ES-1 Tested. Test results apply within the tested dimensions of a 4-in. inside face, a 12-in. outside face and a 16-in. wall width. Of the other five Creative Design Series versions, only Reveal carries a testing entry, ANSI/SPRI/FM 4435/ES-1, and the rest show N/A.
Miters, endcaps and accessories
Miters and accessories are shop-fabricated, which removes field fabrication. Unless noted otherwise, they are furnished with a non-penetrating quicklock joint that is factory sealed watertight. Welded miters and accessories are available at a surcharge and need a minimum material thickness of .050 in.
The accessories with their own drawings are:
- outside and inside coping miters with endcaps, in left-hand and right-hand versions;
- non-90° miters and outside and inside T miters;
- Z coping miters, step-up coping miters, and peak and valley miters;
- the Space Maker outside coping miter;
- transition coping miters and straight coping transitions, with or without capped ends;
- endwall flashing in a coping version and a splice-plate version;
- pilaster caps.
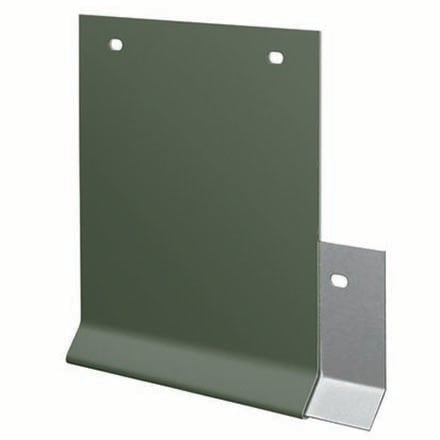
The coping version of the endwall flashing has an 18-in. leg, a 1/2-in. caulk cup and a 3/8-in. space for the wall width, and it is made in right-end and left-end hands. Radius and specially fabricated pieces are also available, and the print approval form carries quantity lines for outside miters, inside miters, right endcaps and left endcaps.
Installation sequence
The instructions open with a caution to install miters first. The roof membrane is positioned on top of the wall, covering the treated wood nailers or substrate completely, with a minimum of 1/2 in. of excess membrane beyond the nailer where applicable.
- Corner support clips: locate and fasten galvanized corner support clips to the wall.
- Miter splice plates and anchor clips: position the splice plate in the center of the anchor clip, then install the splice plate and anchor clip assembly into each end of the corner.
- Miter: place the corner assembly into position and secure it at the exposed edge of the anchor clips.
- Endcap anchor clips: locate and fasten galvanized anchor clips to the wall with the fasteners provided for the substrate.
- Endcap splice plates: place the splice plate onto the second anchor clip.
- Endcap: hook the outside face of the endcap over the anchor clip and rotate it into place, then engage the rear leg onto the anchor clips by pressing downward until the snap lock occurs.
- Anchor clips: fasten galvanized anchor clips to the wall at 4-ft. centers with the provided fasteners.
- Splice plates: place a splice plate onto the anchor clips at each splice joint, with joints at 12-ft. centers.
- Coping: hook the outside face over the anchor clips, rotate into place and press downward until the snap lock occurs.
- Completion: continue installing coping with a 3/8-in. space at splice joints for thermal expansion. Field cuts are made with a fine-tooth hacksaw or snips, and the protective film is removed immediately.
The anchor clip fastener goes in the third full hole from the bend. It is not over-tightened, and a 3/8-in. gap is maintained. For Creative Design Leak-Tite Coping, fasteners must be corrosion resistant and rated for a minimum 250-lb. pullout force in the substrate used. Where an EIFS system is present, fastening is made through the face with a fastener long enough to penetrate the nailer.
Wind warranty
A 20-year, 120 mph Creative Design wind warranty is available on orders that call for it. It provides a maximum of 20 years and 120 mph coverage for the repair or replacement of any portion of the roof edge system that has failed because of a defect in Metal-Era-supplied materials. The finish warranties described above are separate.